This article covers what a Unity Prefab is and how I use them in more unusual ways from my everyday workflows.
A prefab is a collection of gameobjects saved from the Unity scene, stored into the projects folder as an asset.
Essentially a prefab is a mini Unity scene.
This Asset can be exported with all its dependencies outside Unity into another Unity Project. I have found myself using this feature more than once. Its nicely packages the shaders, materials, meshes, textures and other dependencies too.
Here are a couple of examples of my somewhat unusual approach to using Prefabs on a daily basis…
1.Prefabs have allowed me to be a little bit more creative submitting changes when working concurrently with a team member on a version control software.
I’d say it’s a bit of my own Jugaad.
Sometimes checking in a scene to our server can get tricky if the scene file is already checked out by someone else. I don’t prefer to wait ideal for the scene to be free or if I forgot to check out the scene before working on it, only to find out later that its checked out.
In such cases, I carry on making the changes I have made so far. Save my work as a temporary prefab. Get the latest when the scene is free again.
Then merge my temporary prefab with the latest scene, disconnect + delete the temporary prefab.
Keep in mind, this is a risky method if the gameobjects aren’t disconnected from the temporary prefab properly. Also, tricky if you are replacing a gameobject that is connected to another script or dependent on it. Those references will be lost and you ll end up with null reference errors!
In such cases you need to use,
Unity’s Find and Replace gameobject option, also called Unpack Prefab.
This will replace all dependencies the old gameobject had. I personally try to avoid this as much as I can. If any anything I can just use the temporary prefab gameobjects to copy paste my changes in the inspector. Keeping the same old gameobjects and all its connections.
2.The next common use case of Prefabs I use, is in our symbols. In my last game most of our symbols were prefabs. These symbols were multiple gameobjects with meshes, sprite and particles. They would get cloned and show up multiple times on the screen. So making them prefabs was essential. It allowed us make a change to one gameobject, in return update all of them.
This setup also helped me with optimizations. One of our symbols, was taking up a lot GPU power and I decided to test each part of the symbol. To do so, I had to clone the symbol multiple times and turn off one part in all the clones.
Using a Prefab setup, this was easily achieved.
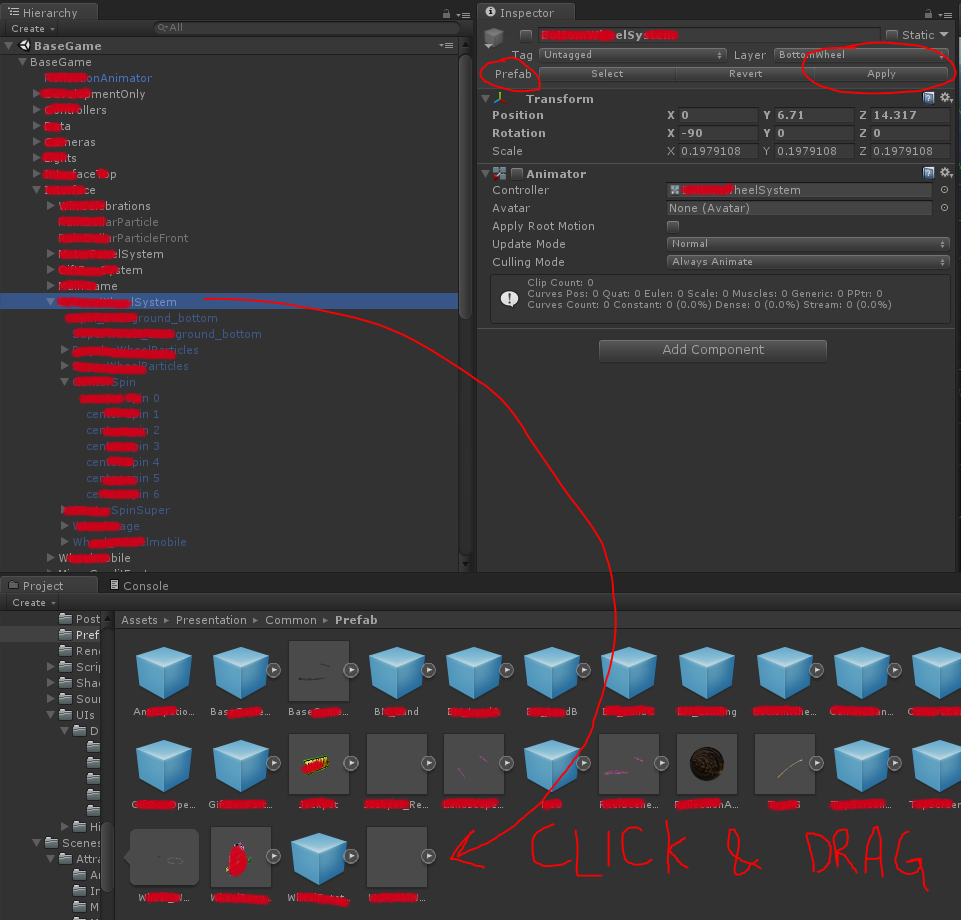
Editing the prefab will edit all its instances only if you click Apply. That means,
Any time you make a change you must press Apply on the Prefab.
Otherwise no other instances will be updated. This will cause an override.
This also means breaking a prefab connection will not disconnect others.
So, it is very important to remember the first instance of your prefab. Preferably only update that for future changes. This avoids overrides causing some instances not to update when you press apply on a prefab through an instance. Ideally always Applying through the Prefab Asset in the Projects Folder will not cause these weird cases.
This becomes especially hard to manage when you have hundreds of Prefabs and you are not careful or aware of these little nuances.
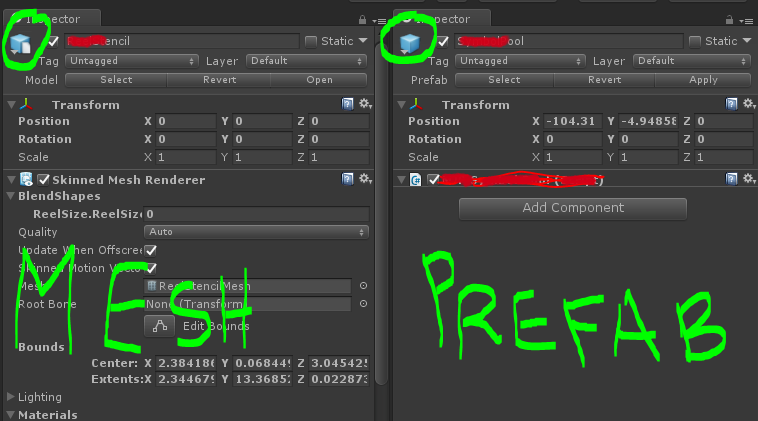
What doesn’t help either, is the Iconography of Prefabs. I have been told Unity has a visual difference to show the Prefabs that are instances and its overrides. To me the icon differences have been very confusing. I feel the same between Prefabs and mesh/model icons.
Lastly, Unity 2018 on-wards a new feature has been added to Prefabs called Nested Prefabs. Definitely check them out. If anything there’s a somewhat funny video on Unity’s YouTube about this feature. Towards the end of the video the speaker talks about nested prefabs within nested prefabs within nested prefabs.
