Summary: In this article I discuss an old school technique to making repeatable textures using Photoshop.
Some textures are better used textures when made repeatable. Besides symmetrical pattern using repeatable texture wherever you can helps with having one texture instead of duplicating multiple textures or making a very large texture. Most common places for repeatable textures is the ground. Where textures like stone, sand, grass need to be laid across a larger surface area.
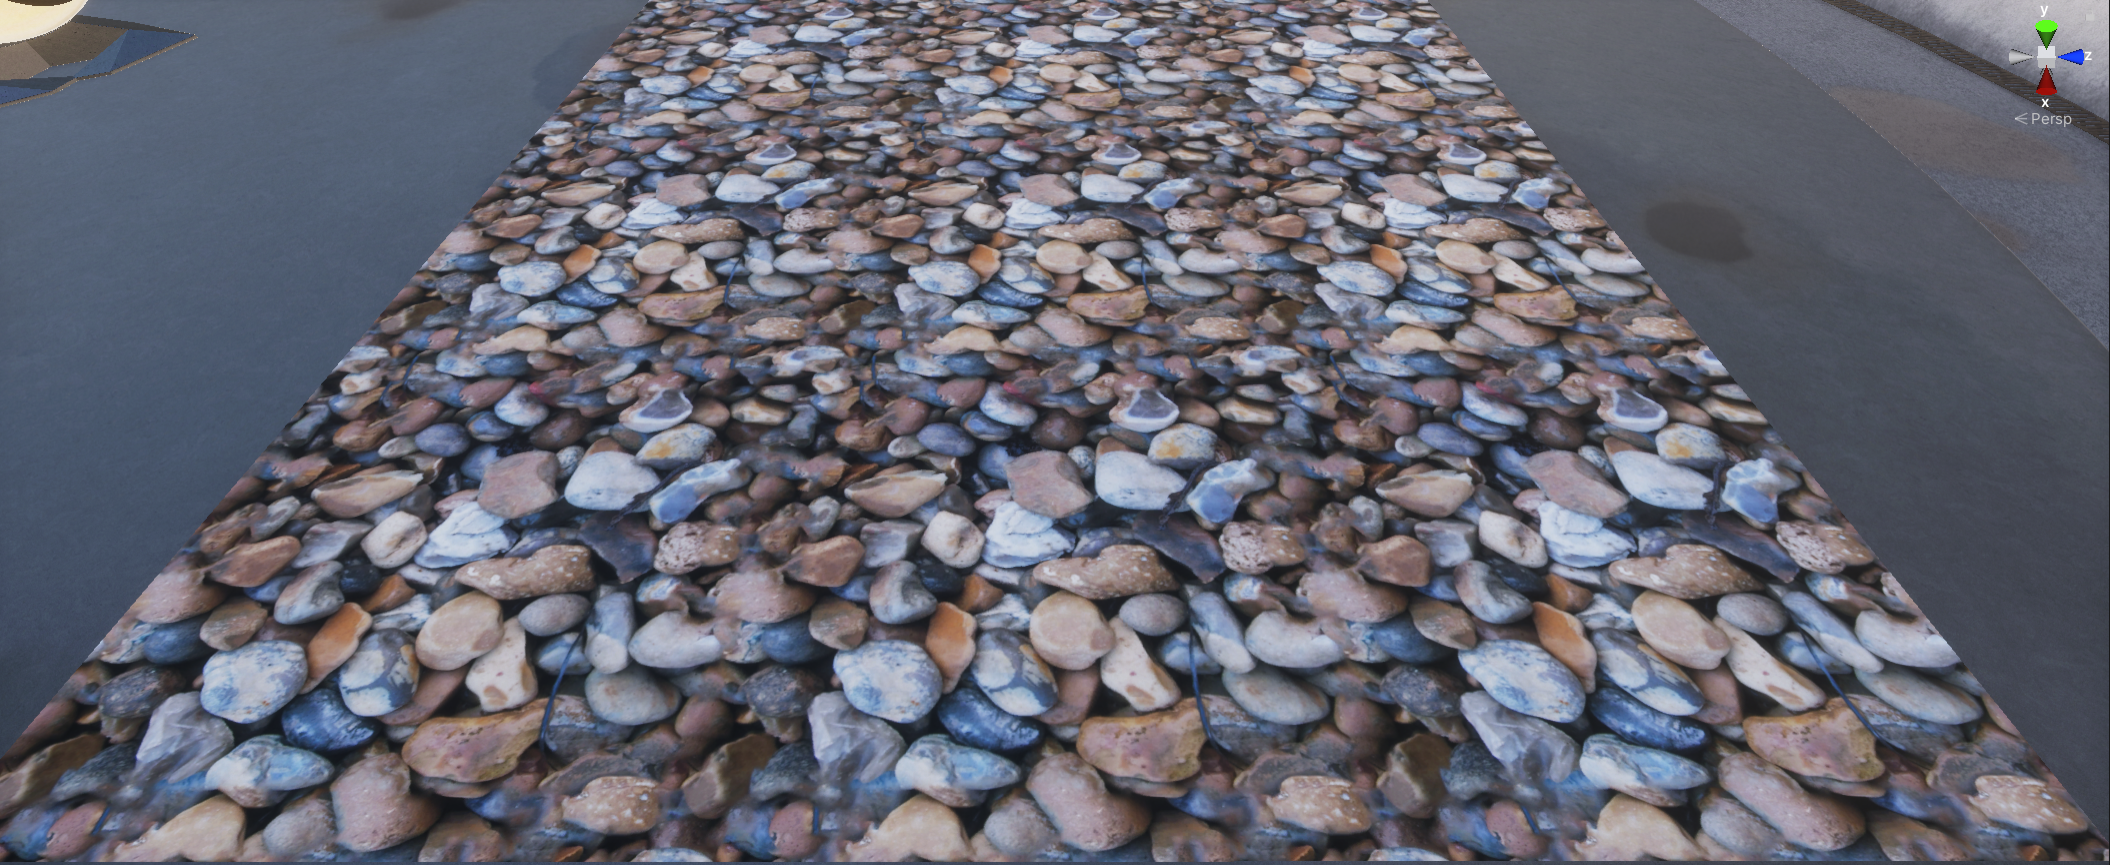
Let’s take an example of a stone pathway to demonstrate the power of repeatable textures.
The free texture used in this article was downloaded from https://www.textures.com/ . Also known as CG Textures 10 years ago. They are best site to get any Game textures you could think of.
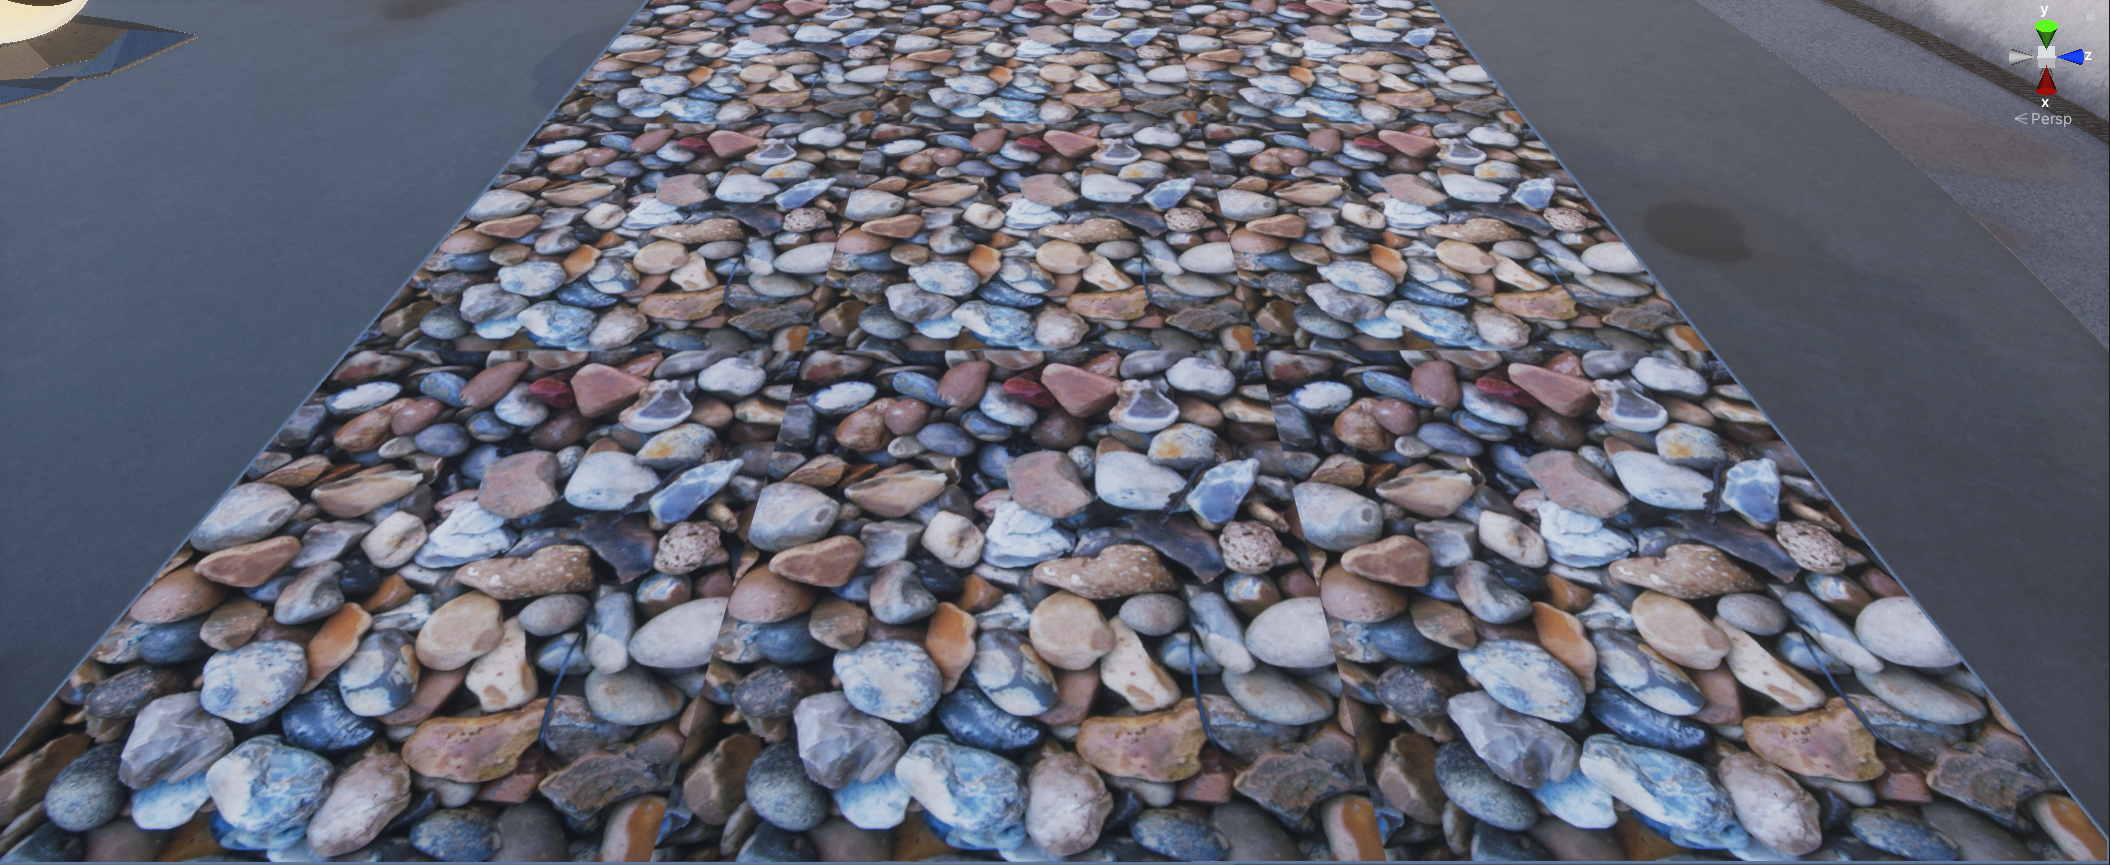
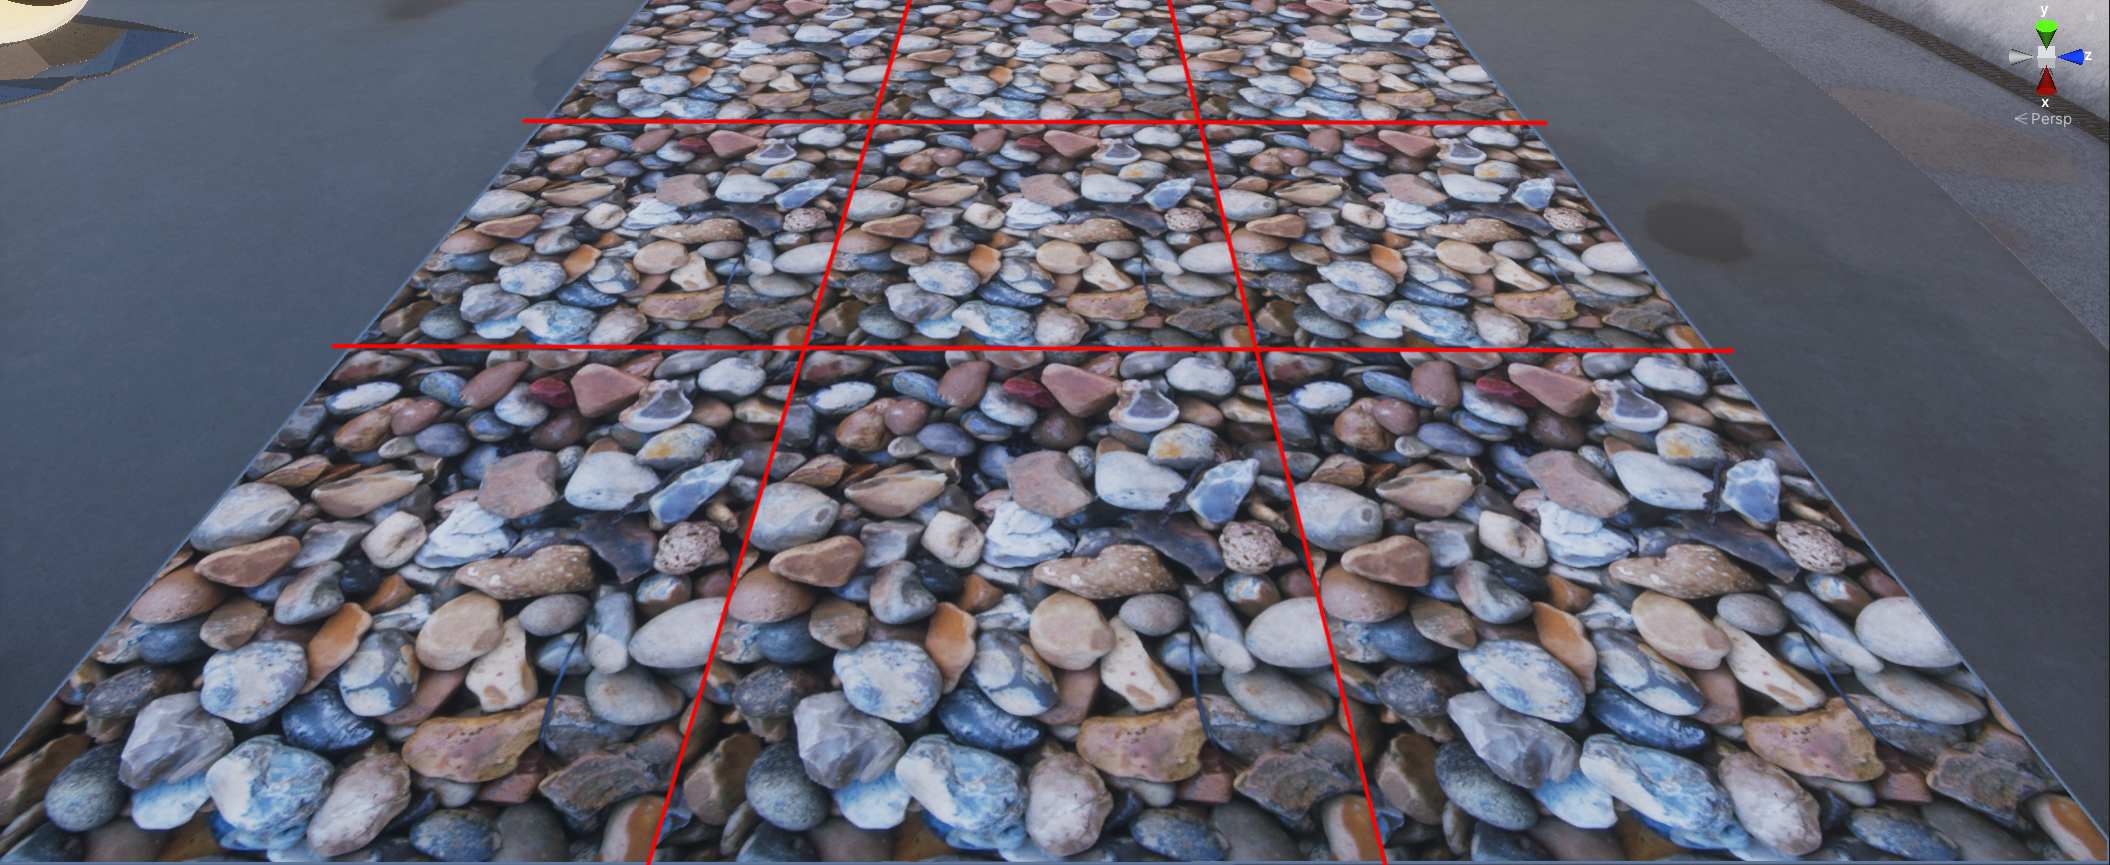
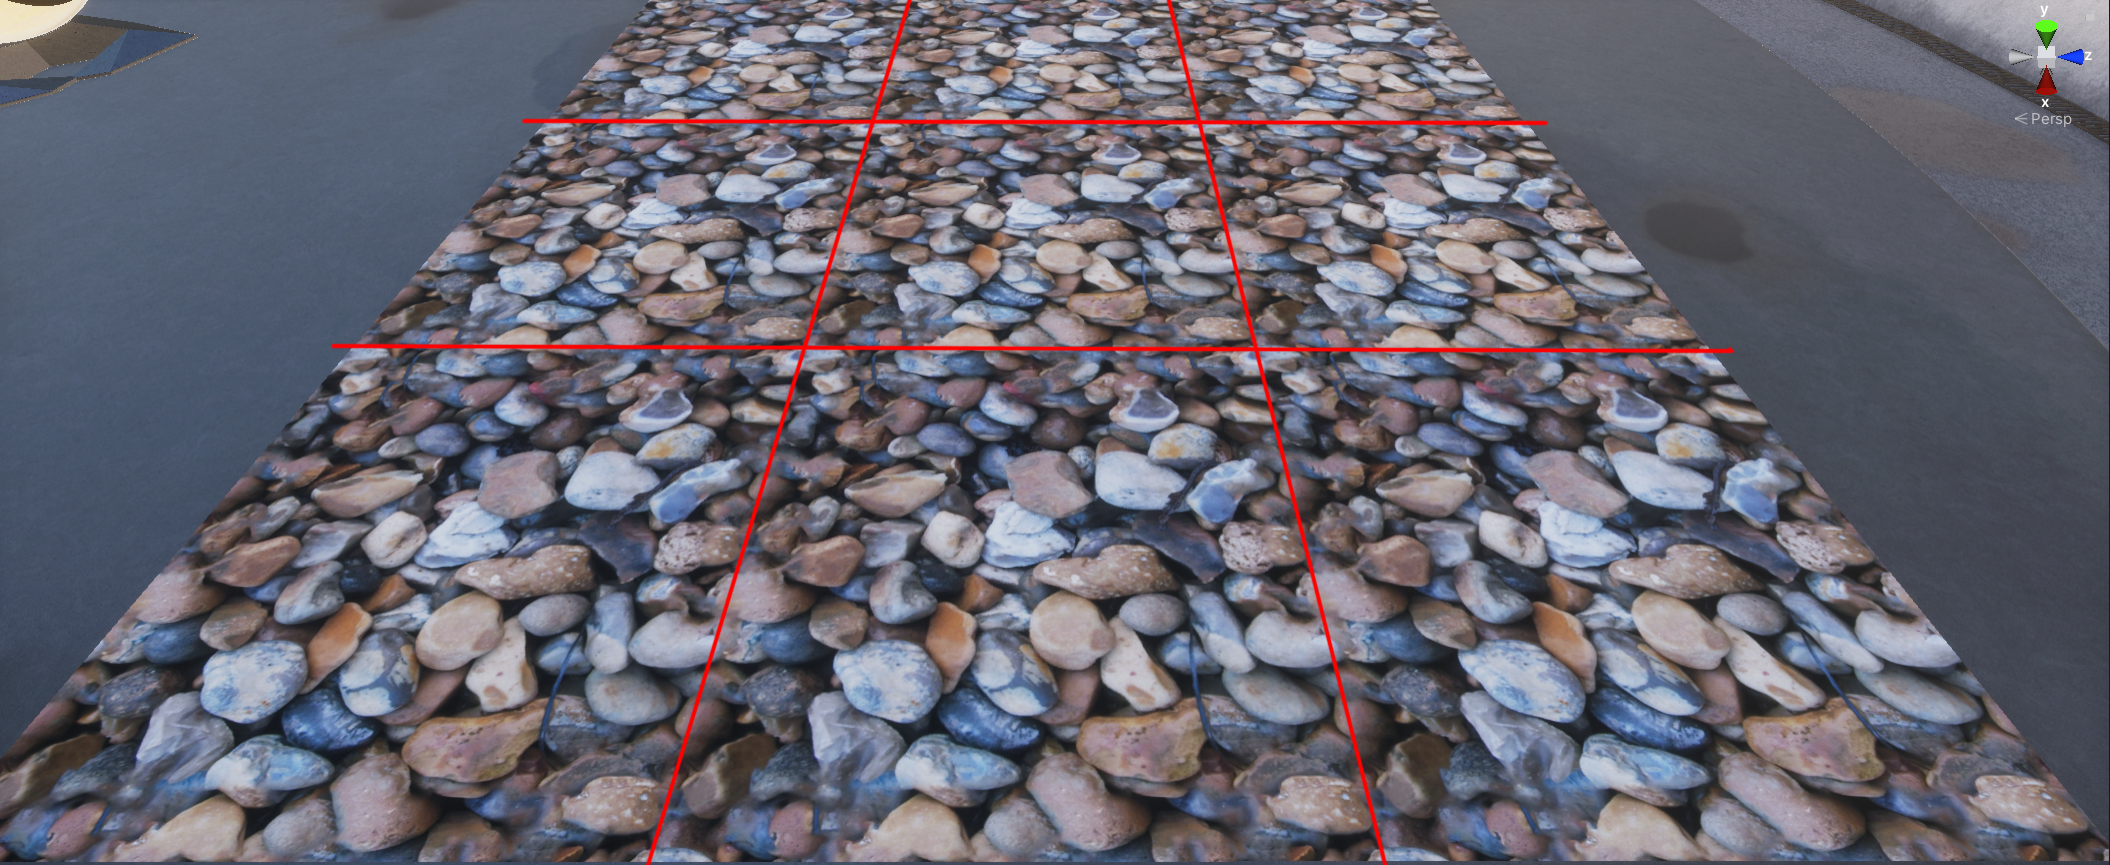
Since this texture is not repeatable you can see the seam lines whenever the texture repeats.
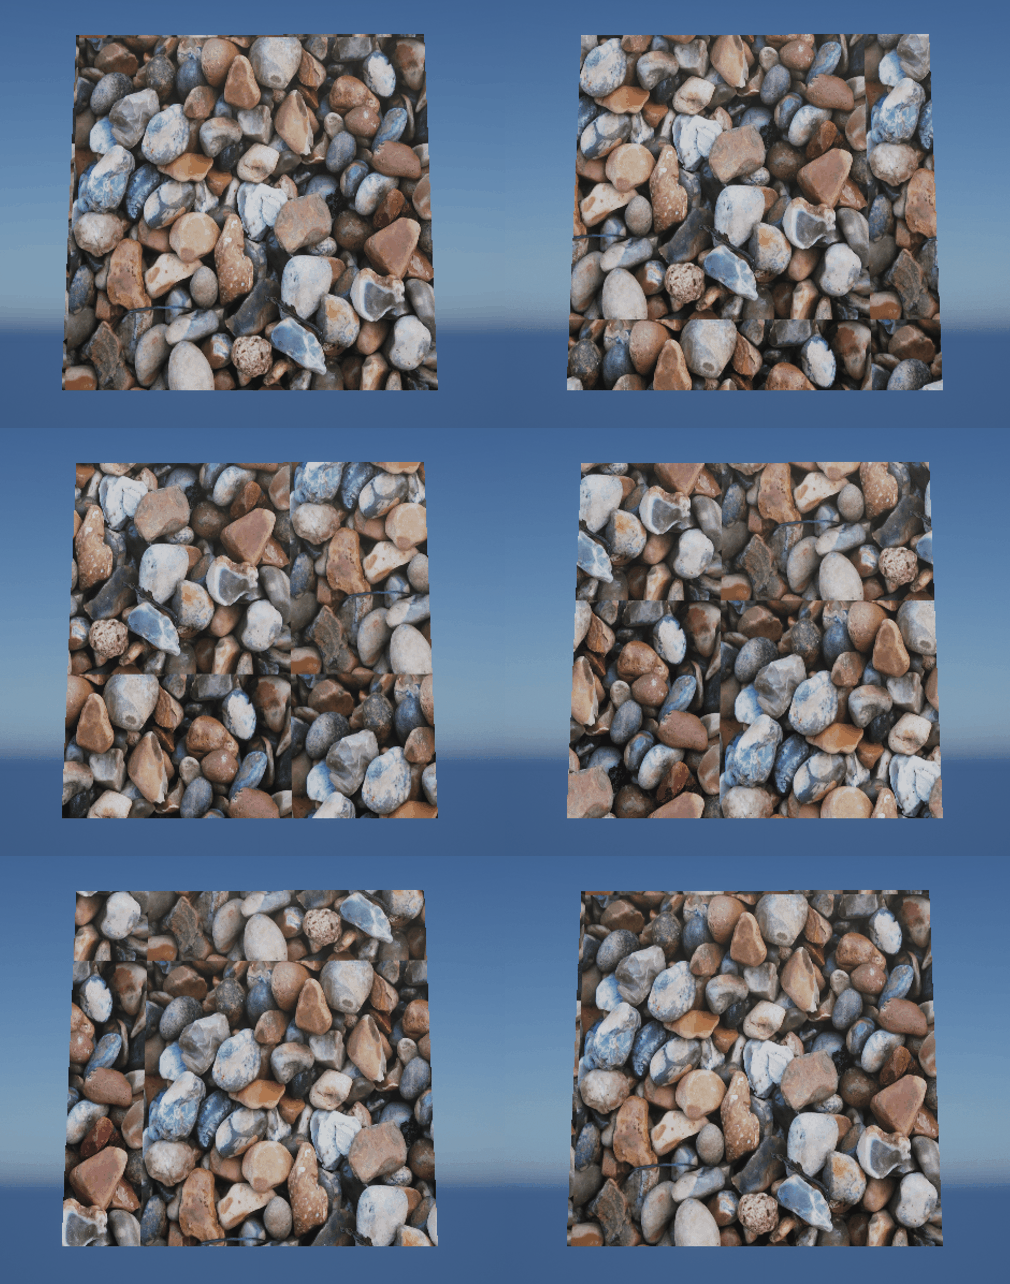
Here’s another example of the problem we are facing. We will now, make this texture repeatable and see the difference in the result. Let’s head into Photoshop.
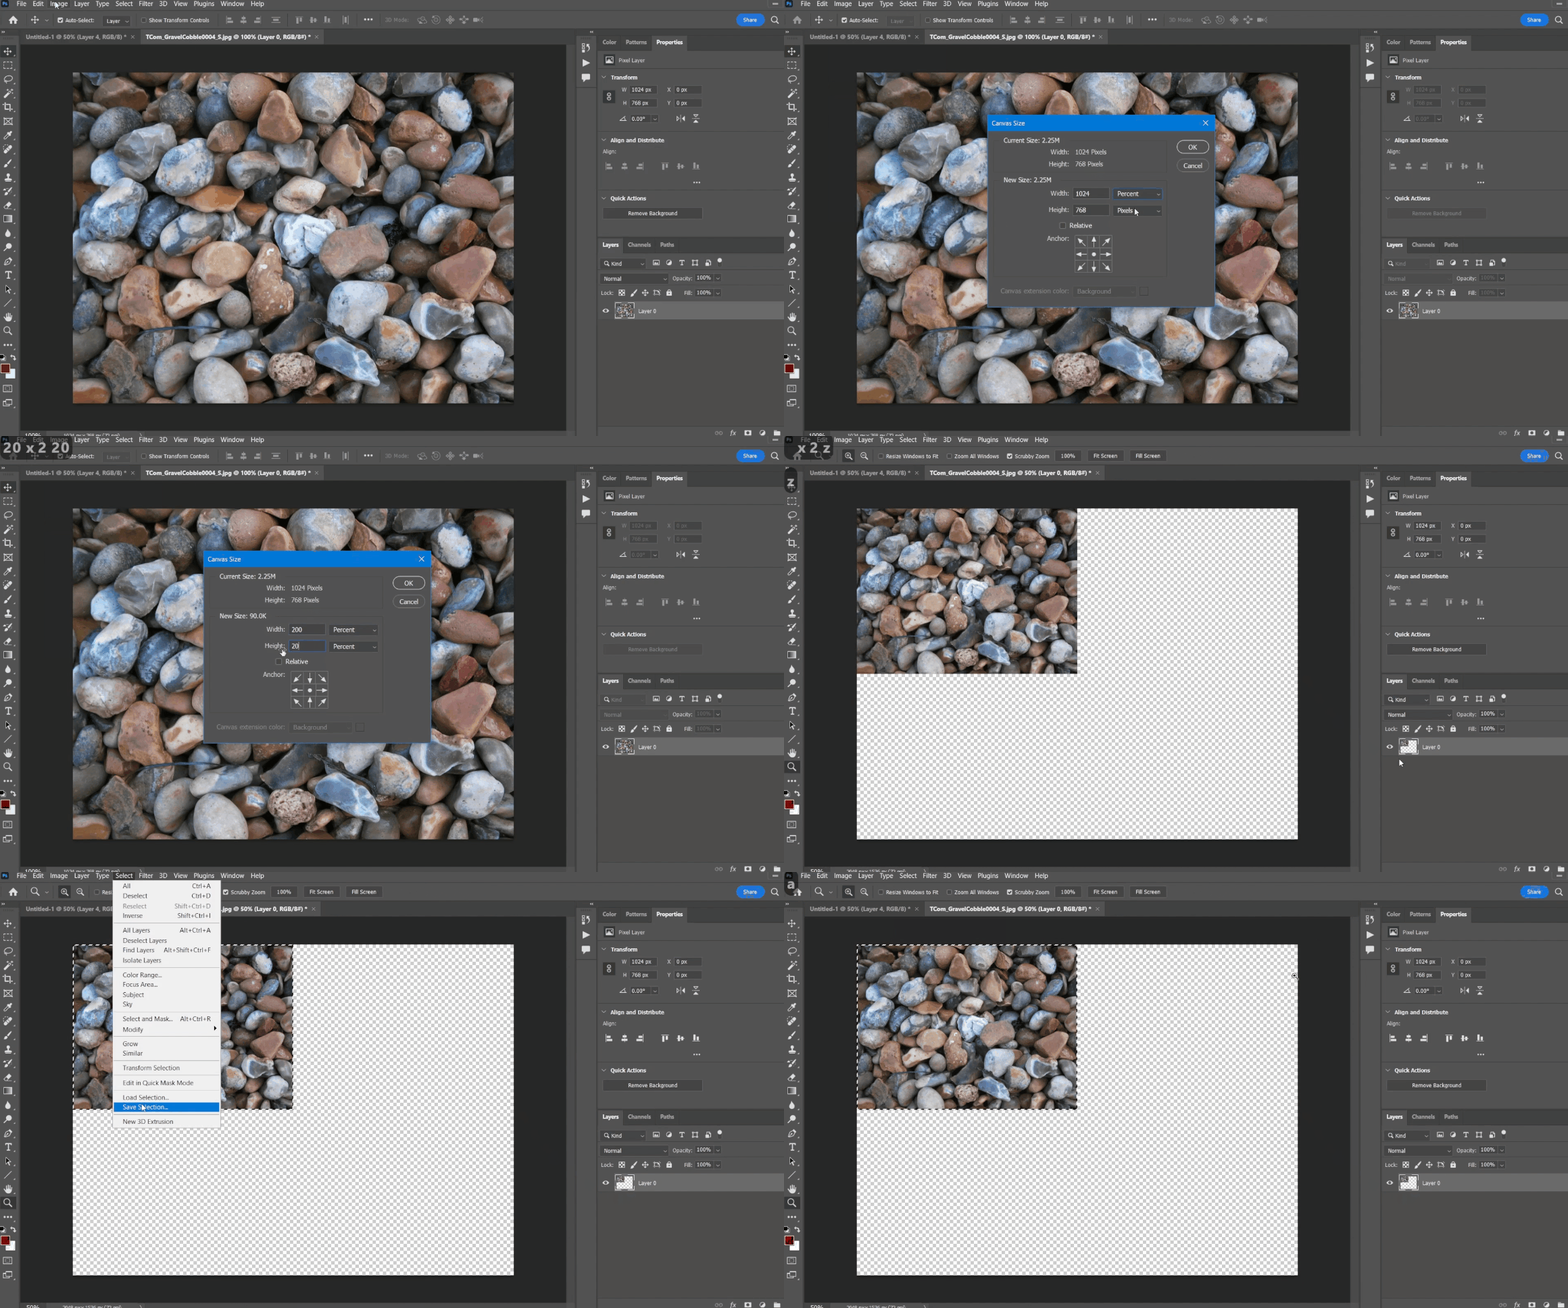
1. Double up the Texture Canvas size
1.1. Open up the texture in Photoshop with the canvas size being the same size of the texture.
1.2. First we will double our canvas to fit 4 copies of the texture. By Going into Menu Image >> Canvas Size. Increasing it by percentage of 200. And expanding from the top left corner, so that our texture is positioned at the top left corner of the the larger canvas.
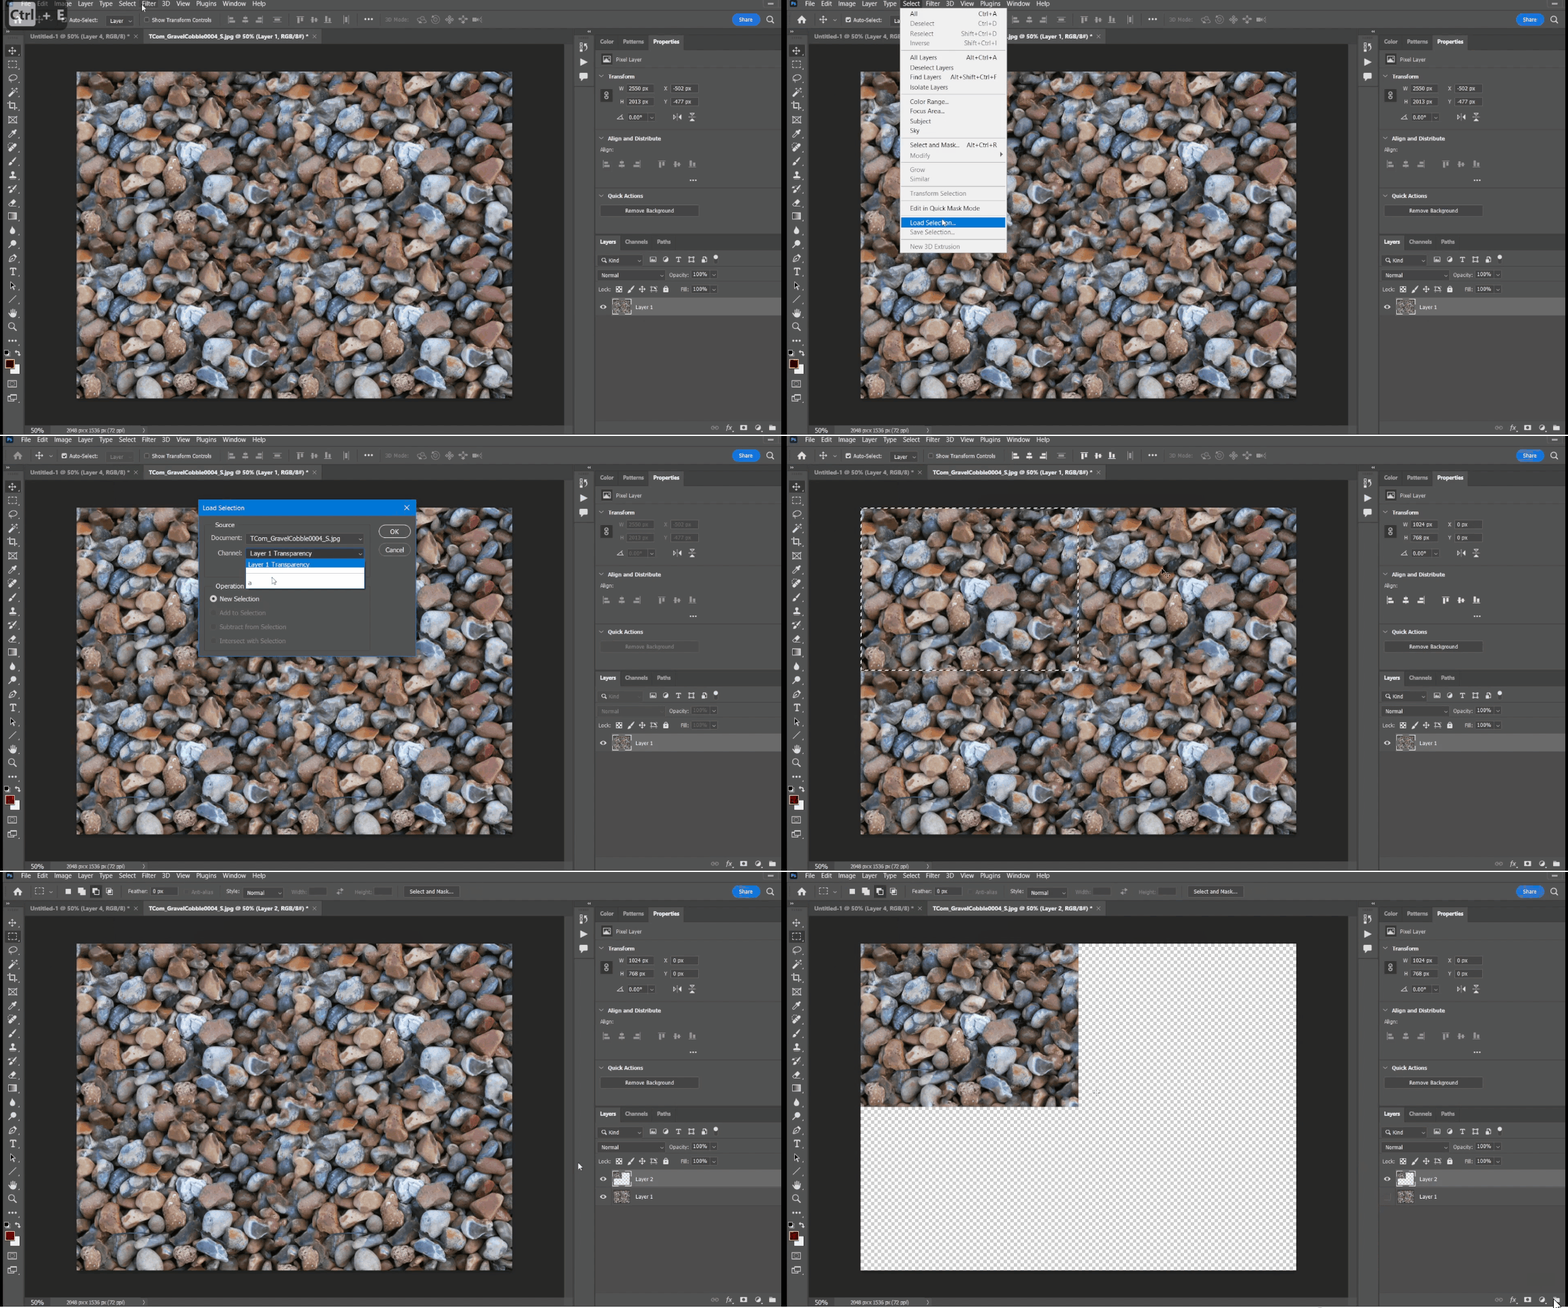
1.3. Let’s also save the selection size of our texture. To save the selection. Ctrl + left mouse click the image thumbnail of our texture layer. This will select all pixels of the texture. Then go into Menu Select >> Save Selection. Give a name to the selection and click OK. We will use this selection later.
2. Fix Vertical Seam
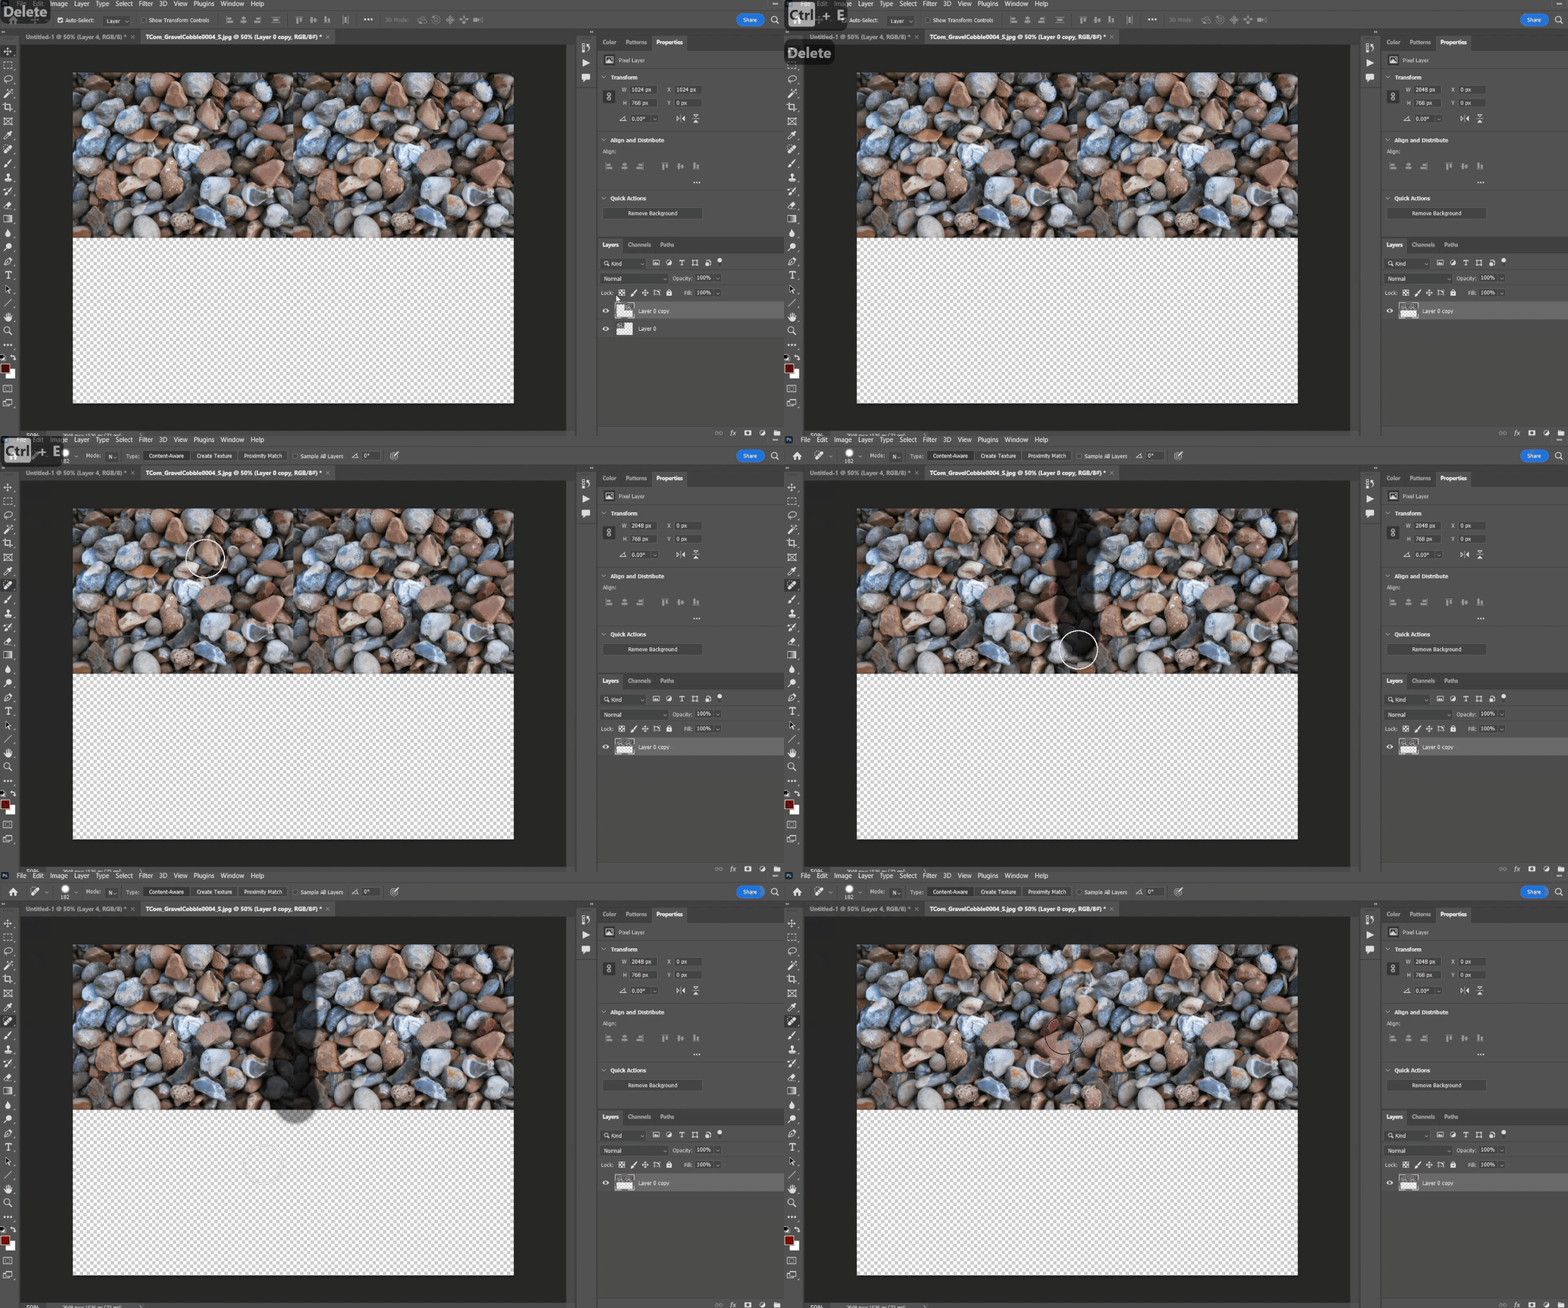
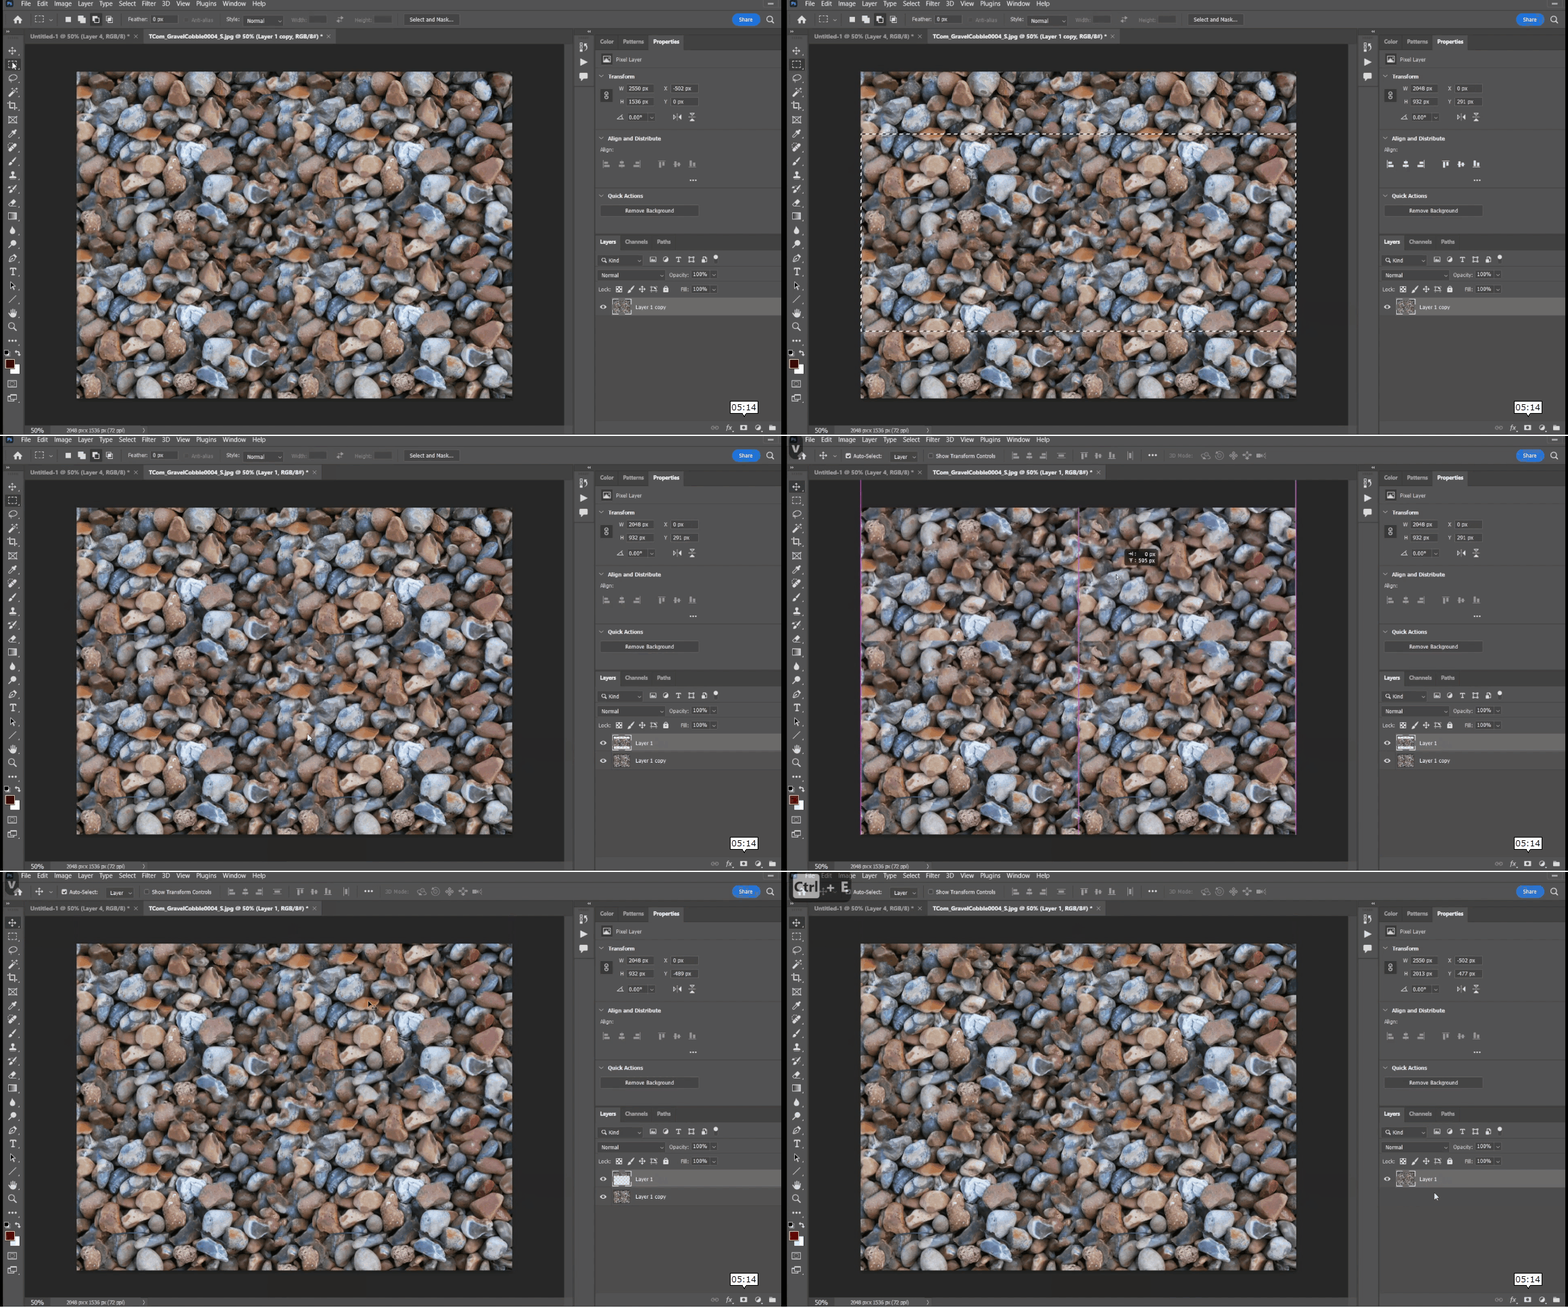
2.1. Now we will duplicate the layer. Place it on the right side of the texture. Make sure it snaps right on the right edge of the first texture layer. You can do so by holding hold shift while you use the move tool to place the layer. Shortcut for move tool in photoshop is “v”.
2.2. Merge both the layers by selecting both layers and pressing ctrl + e.
2.3. Now we’ll use the Heal brush or the Stamp tool to fix out seam. Use these or any other tools in photoshop. It should look like the stones textures have no hard line between them.
2.4. Once you are happy with the result, merge the layers.
3. Merge Fixed Vertical Seam
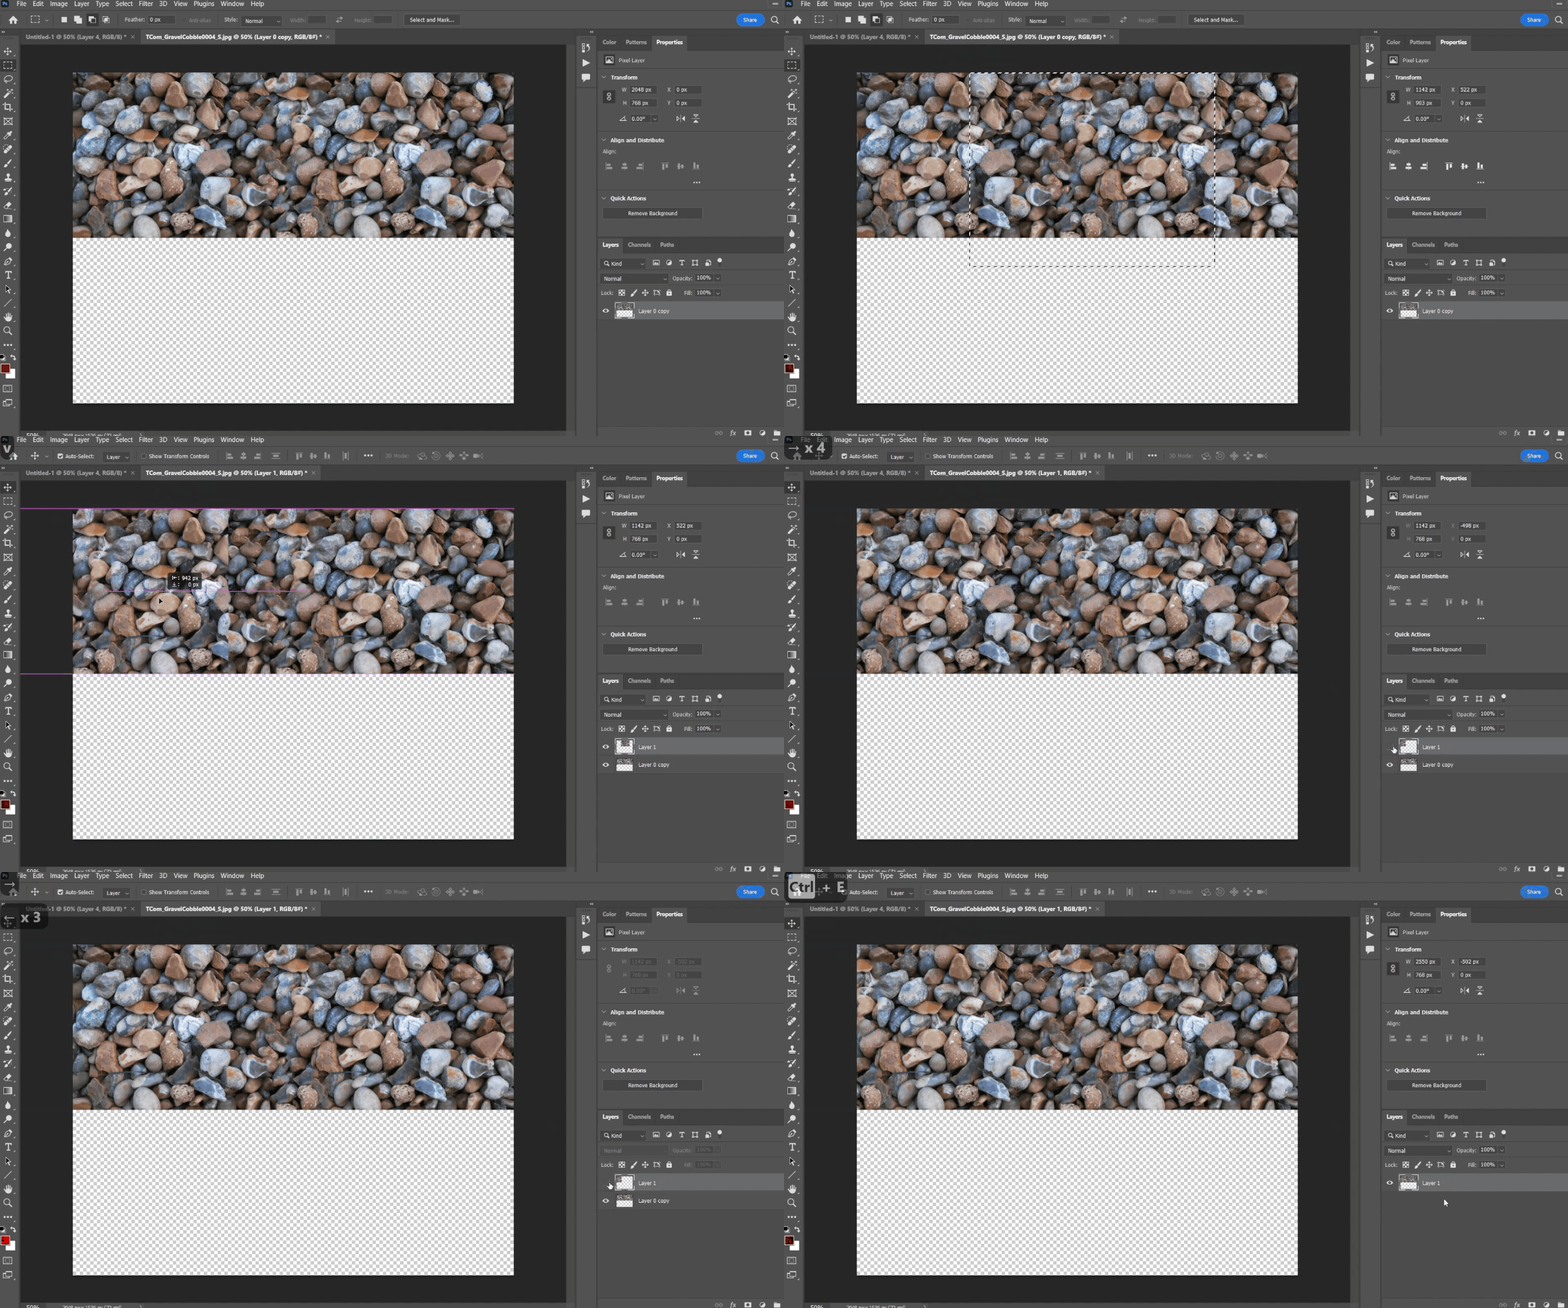
3.1. Now Rectangular Select the fixed area and copy it to a new layer.
3.2. Move this fixed area over the first texture’s left most side. Move it till, all stones besides the fixed area match the first texture. If done correctly, only the left corner of first texture will look different.
3.3. Now merge the fixed area layer and the other texture layer.
4. Fix Horizontal Seam
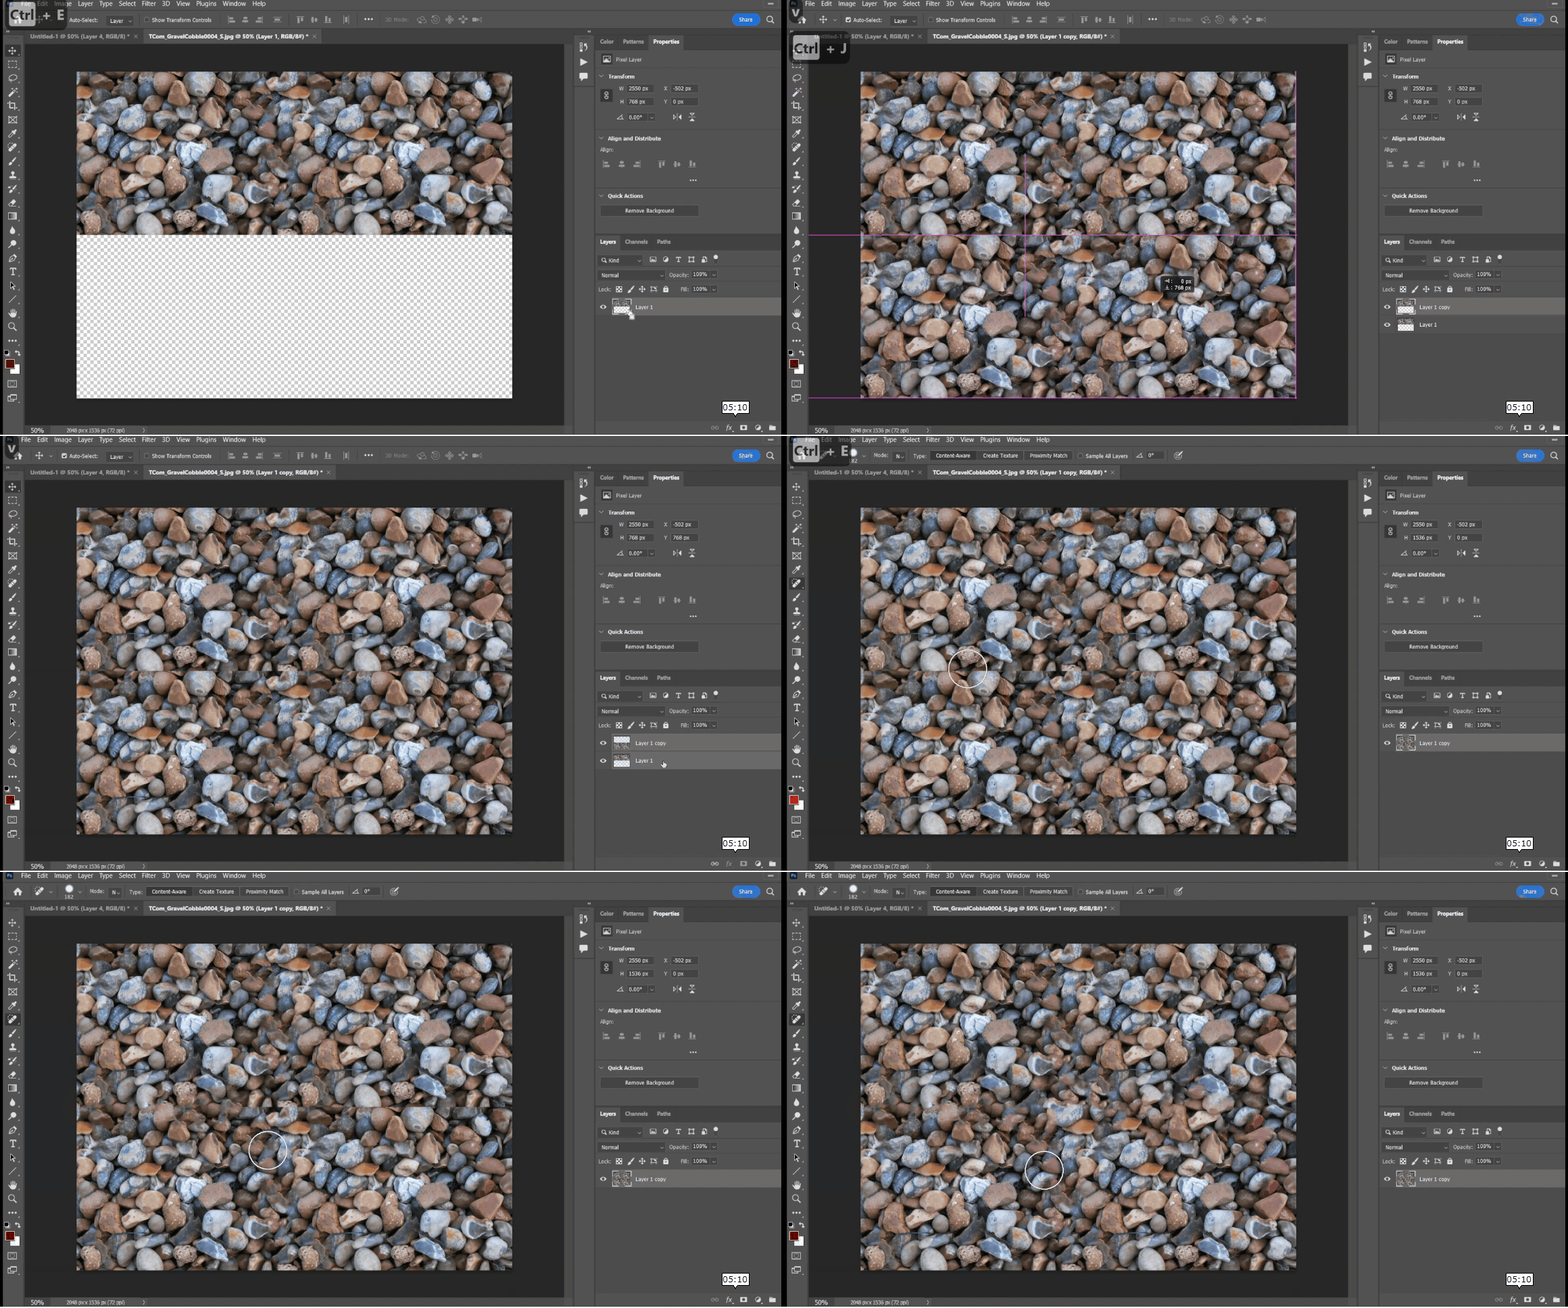
4.1. Duplicate the layer. Place it on the bottom side of the texture. Make sure it snaps bottom of the bottom edge of the first layer. You can do so by holding hold shift while you use the move tool to place the layer.
4.2. Merge both the layers.
4.3. Now we’ll use the Heal brush or the Stamp tool to fix out seam. Use these or any other tools in photoshop. It should look like the stones textures have no hard line between them.
4.4. Once you are happy with the result, merge the layers.
5. Merge Fixed Horizontal Seam
5.1. Now Rectangular Select the fixed area and copy it to a new layer.
5.2. Move this fixed area over the first texture’s top most side. Move it till, all stones besides the fixed area match the first texture. If done correctly, only the top corner of first texture will look different.
5.3. Now merge the fixed area layer and the other texture layer.
6. Export new Texture
6.1. Let’s load the selection size of our texture. To load the selection. Go into Menu Select >> Load Selection. Select the previously saved selection name and click OK.
6.2. Using any Marque tool right click and copy to new layer.
6.3. Crop transparent pixels and export new texture.
This is our new repeatable texture.
7. Test the seams
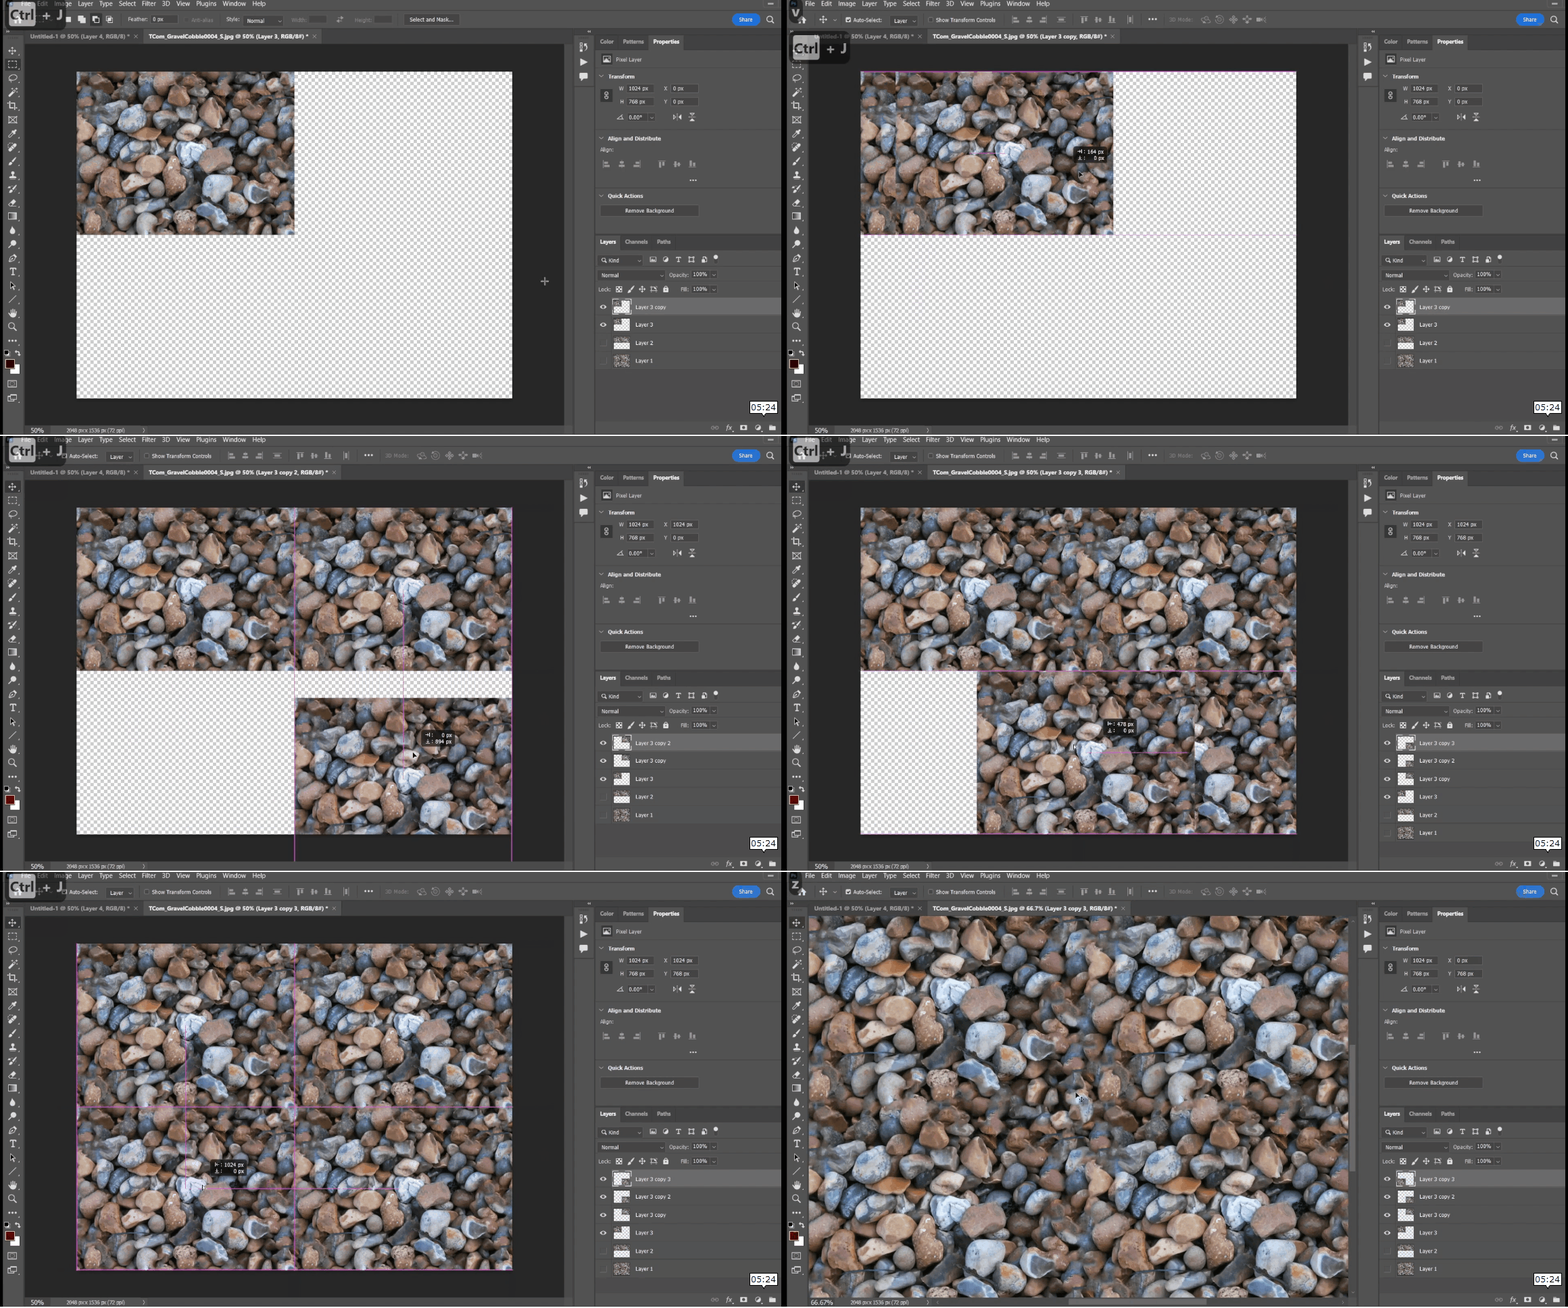
7.1. Now let’s test if the texture is repeatable.
7.2. Duplicate the texture on all sides.
7.3. Zoom in and check where the seam was before.
7.4. If you still see any areas that needs fixing. Repeat the steps again.
Here’s the final result.
