Summary: This article covers a shader made in Unity to scroll UVs of a texture overtime.
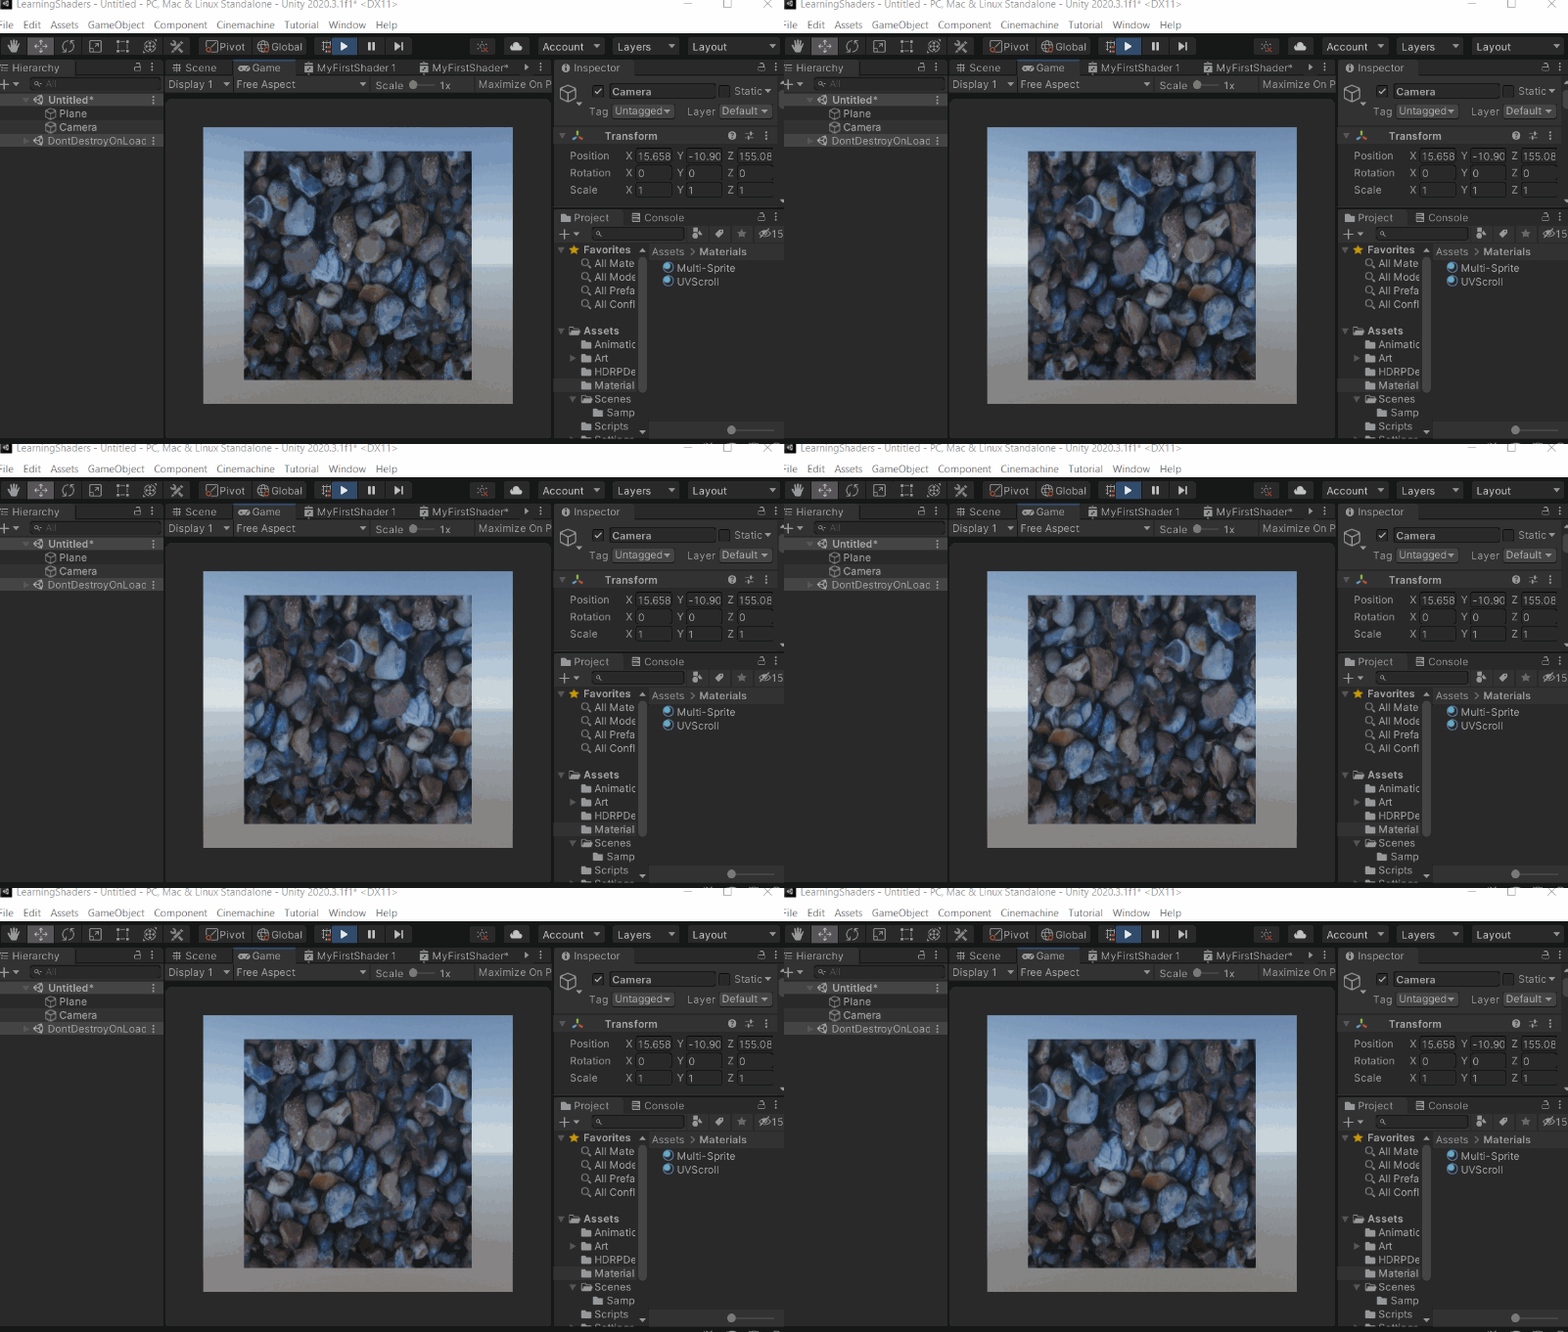
We will move the UV coordinates of a texture on a model to scroll the UVs. This shader is made using Unity’s Shader Graph.
Usually when scrolling UVs, we don’t want to see a break when the UVs reach the end of the texture and restart. So the texture needs to be tileable. To make sure the texture can repeat properly.
Follow this previous article to make your texture repeatable or tileable.
Once you have a tileable texture. Follow these steps for Unreal to make the UVs scroll.
1. Make a new Shader Graph and add a texture to it.
Start Unity. Make a plane. We’ll make a new shader for this plane.
Follow these steps:
1.1. To make a new plane, right click in the Hierarchy. Go to 3D Object >> Plane.
1.2. To make a new shader, right click click inside Project tab. Go to Create >> Shader >> Blank Shader Graph
1.3. Rename your shader graph and double click to open it up.
1.4. Now let’s give the graph a render pipeline to follow. Under Graph Inspector >> Active Targets. If your project uses Universal render pipeline, High Definition render pipeline or any others, Set you shader to use that.
1.5. Let’s add the texture to the shader. Inside Share graph, right click in a empty space and select Create Node. Search for Sample Texture 2D and select it. Now attach the RGBA output of the texture to the Fragment Shader’s Base Color.
1.6. Go to the input/left side of the Sample Texture node and click the tiny circle in Texture connector to select a texture for this node.
1.7. Search for your desired texture and select it to add to the Sample Texture as the default texture.
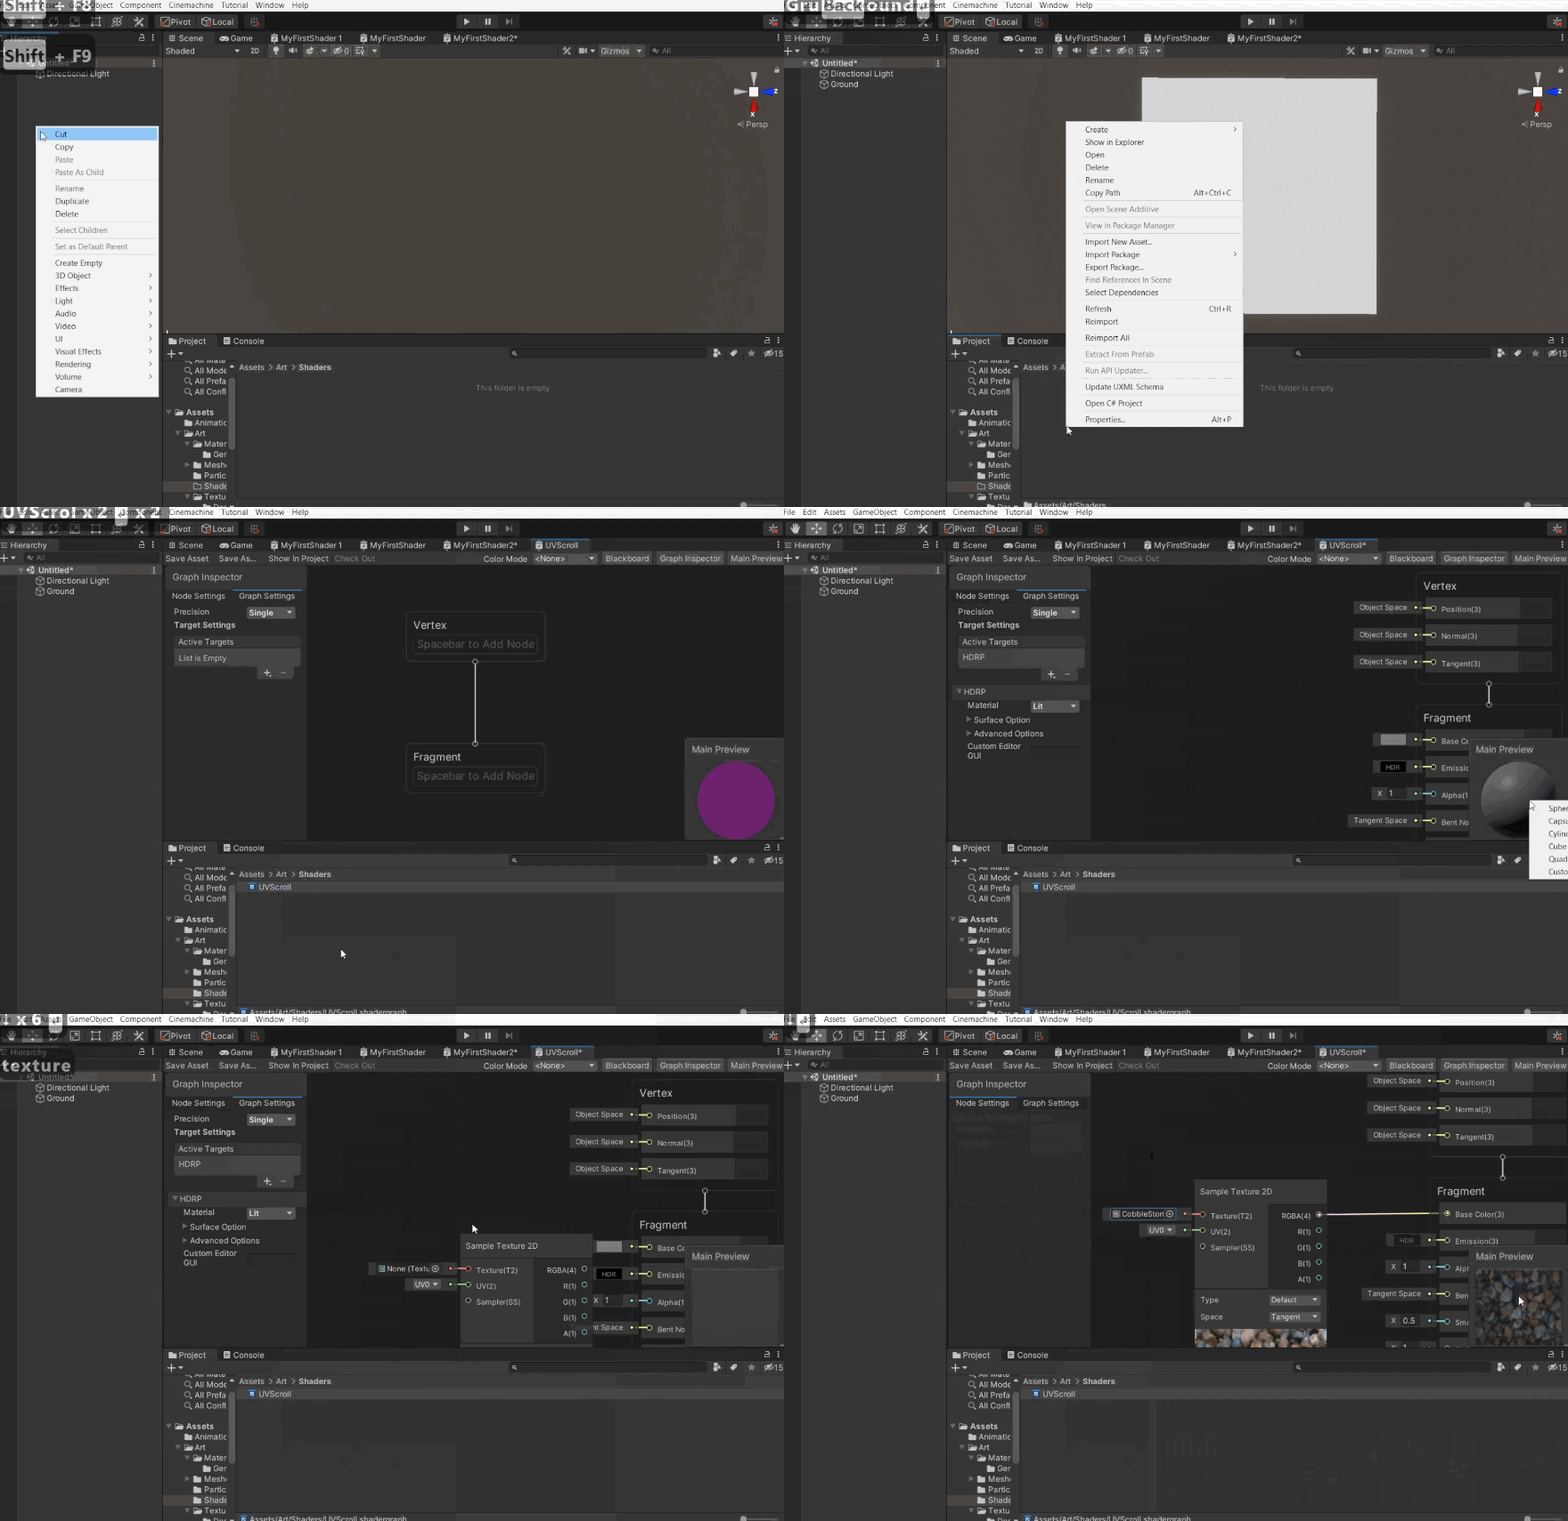
Pressing Spacebar while the mouse is an empty space is the shortcut for the Create node Menu in Shader Graph.
2. Add U and V modifiers.
We will connect 2 user driven constants to modify the U and V coordinates of the texture.
Follow these steps:
2.1. Make a UV node to manipulate the UVs of the texture. Under Create Node search and select UV.
2.2. Make two constants to change values of the Texture Coordinate node. Under Create Node search and select Float.
2.3. Next Under Create Node search and select Vector 2 node. Connect both constants as the input for the Vector 2. Vector 2 will maintain individual values from each constant.
Appending the constants together makes one node outputs for both values.
2.4. Next Under Create Node search and select Add node. Connect the Vector 2 node and UV node together as the input to the Add node.
2.5. Connect the Add node to the UV slot of the Sample Texture 2D node.
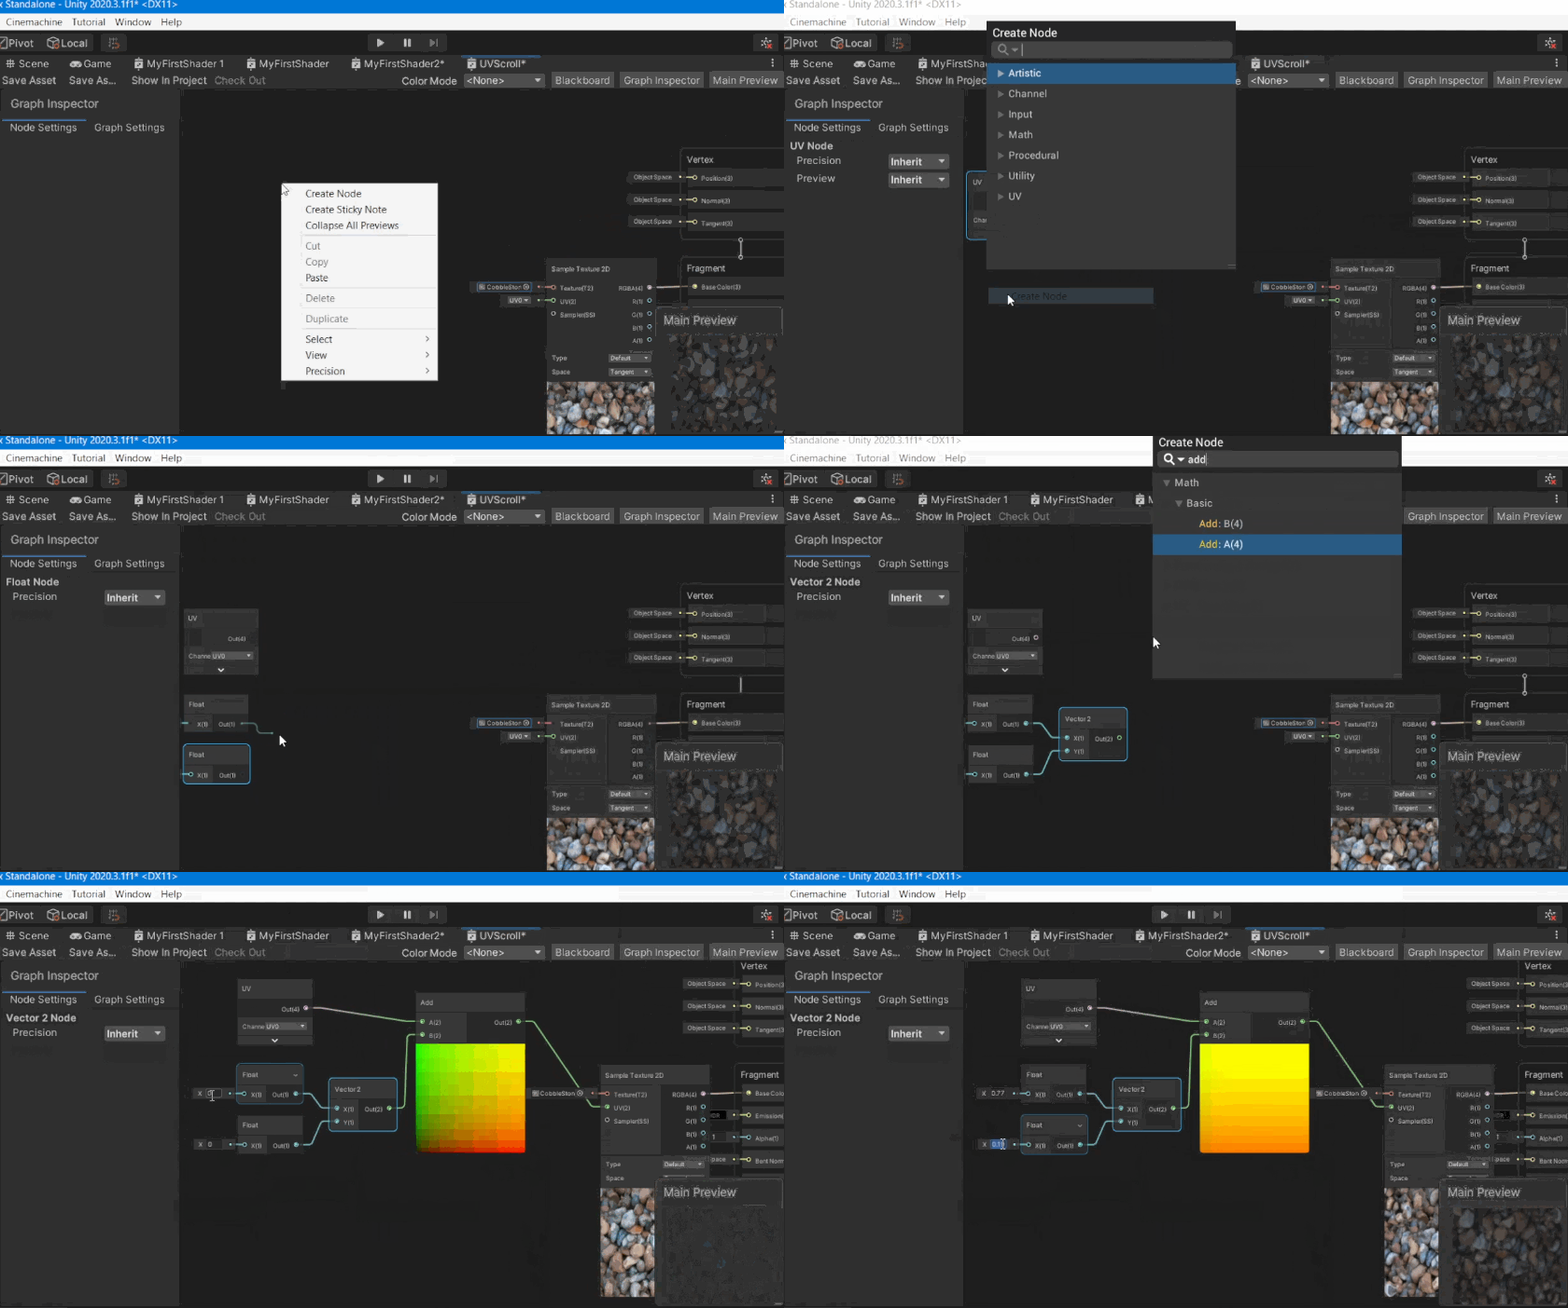
Now the Texture’s UVs can be manipulated by changing the two floats. Try changing both of the Float Node’s values and see how the texture updates.
3. Update U and V modifiers over time.
Now, we’ll use a Time node to update the U and V modifiers. Thereby updating the UVs of the textures over time.
Follow these steps:
3.1. Right click on an empty space. Under Create Node search and select Time node.
3.2. Now let’s multiply the Time Node with the Vector 2 Node. Under Create Node search and select Multiply node. Connect the Time node’s output channel and the output of the Vector 2 node to the Multiply input channels.
3.3. Now connect the output of the Multiply node to the Add node. Note: This will remove the Vector 2 node’s connection with the Add Note made during 2.4.
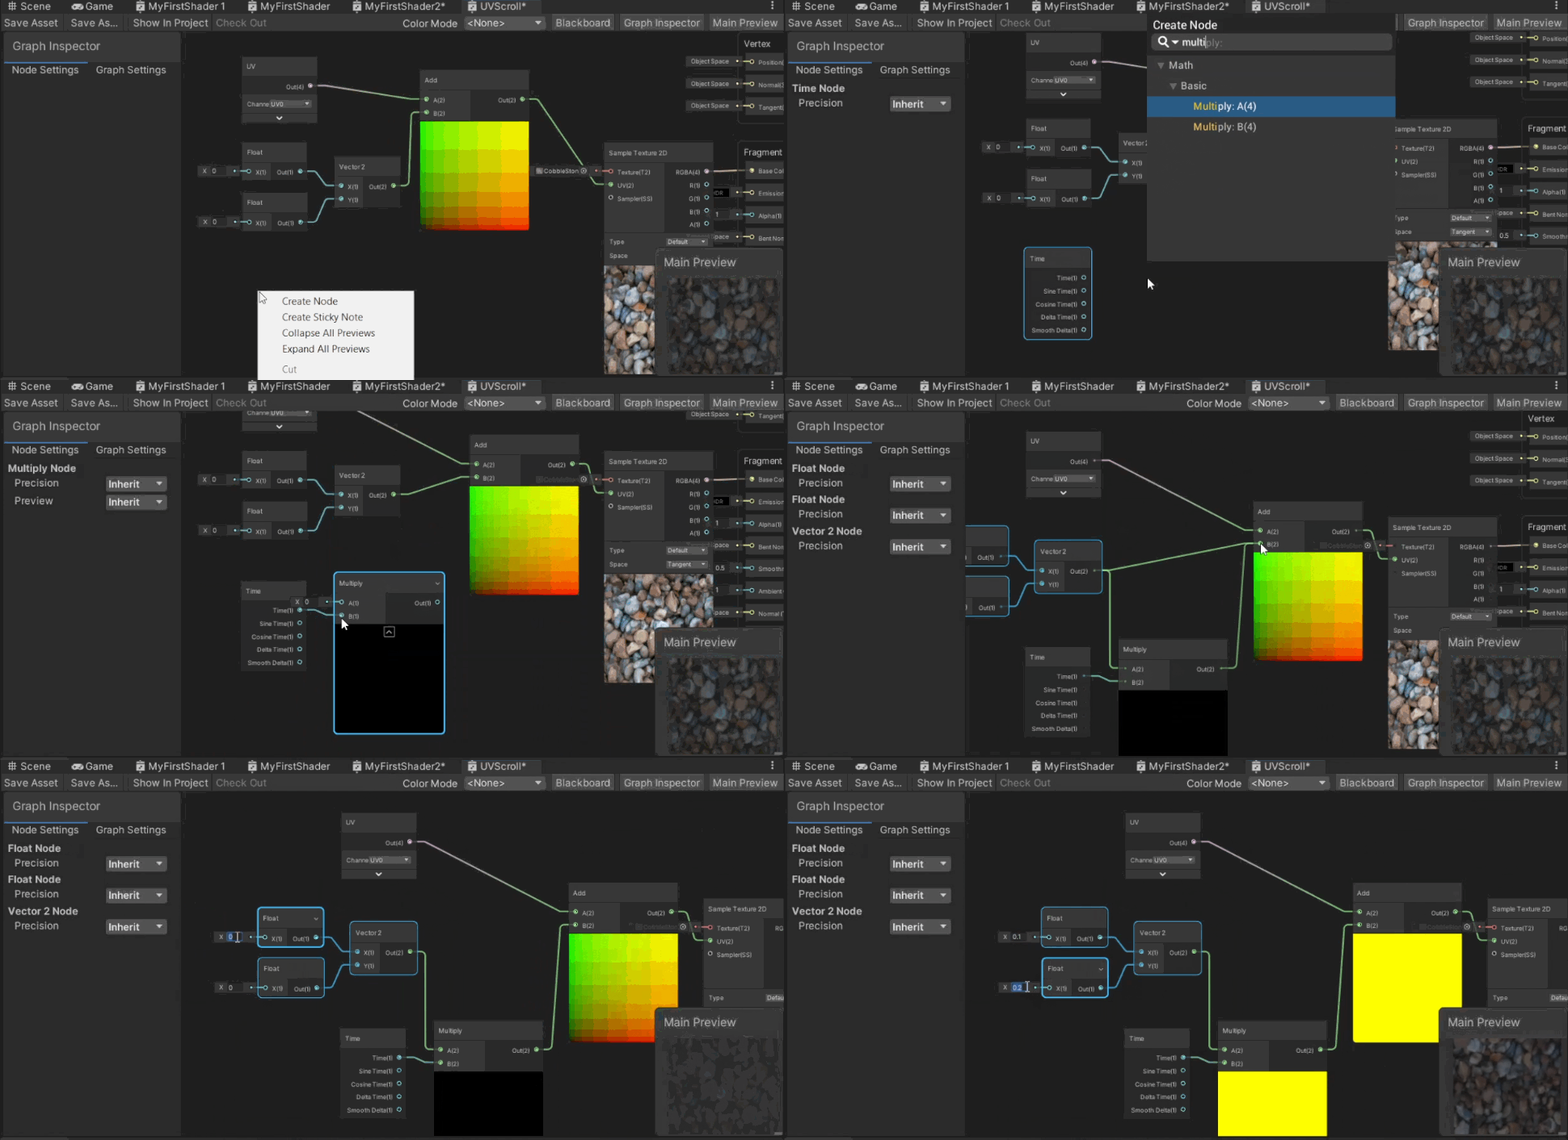
Time will now update the values of the UV coordinates. Thereby the texture over time. Try to add different values to the 2 floats and see the texture coordinates move. Since we multiplied the values, making the constants a larger value will speed up the amount the UV movement you get over time.
4. Convert U and V modifiers to properties.
In order to change the U and V values in Unity’s inspector we need to expose the float as a public variable.
Follow these steps:
4.1. Right click the float node. Go to Convert To >> Property.
4.2. Rename the property as desired. Repeat these steps for the other Float node.
4.3. Press Save, the Shader is now complete.
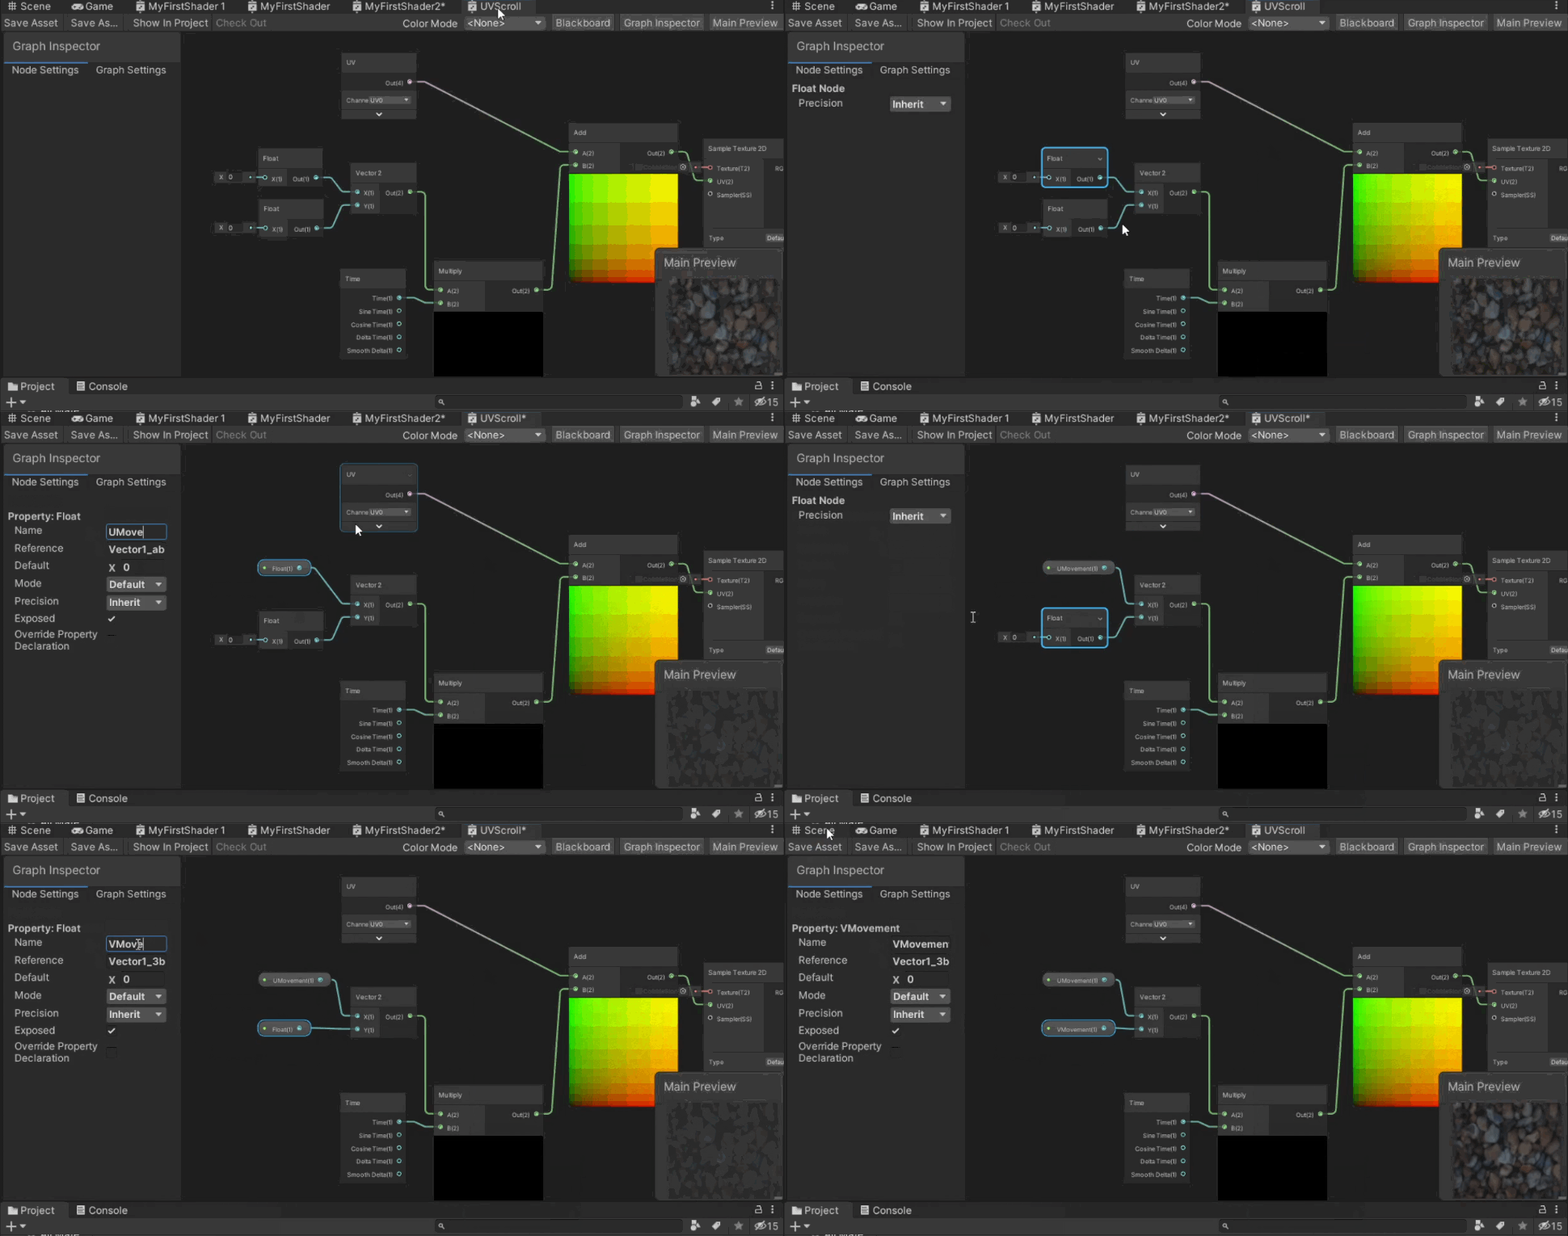
Now the U and V values can be updated via Unity’s inspector inside the material property.
5. Attach the Shader to a Material.
To use the shader on a GameObject in Unity we need to make a material and set the material to the shader we just made.
Follow these steps:
5.1. Right click under the Projects Tab. Go to Create >> Material. Rename your material as desired.
5.2. Now select the material. Under the inspector, go to Shader type and select your shader saved under the Shader Graphs section.
5.3. Now scroll down to exposed properties and you’ll see your Float properties.
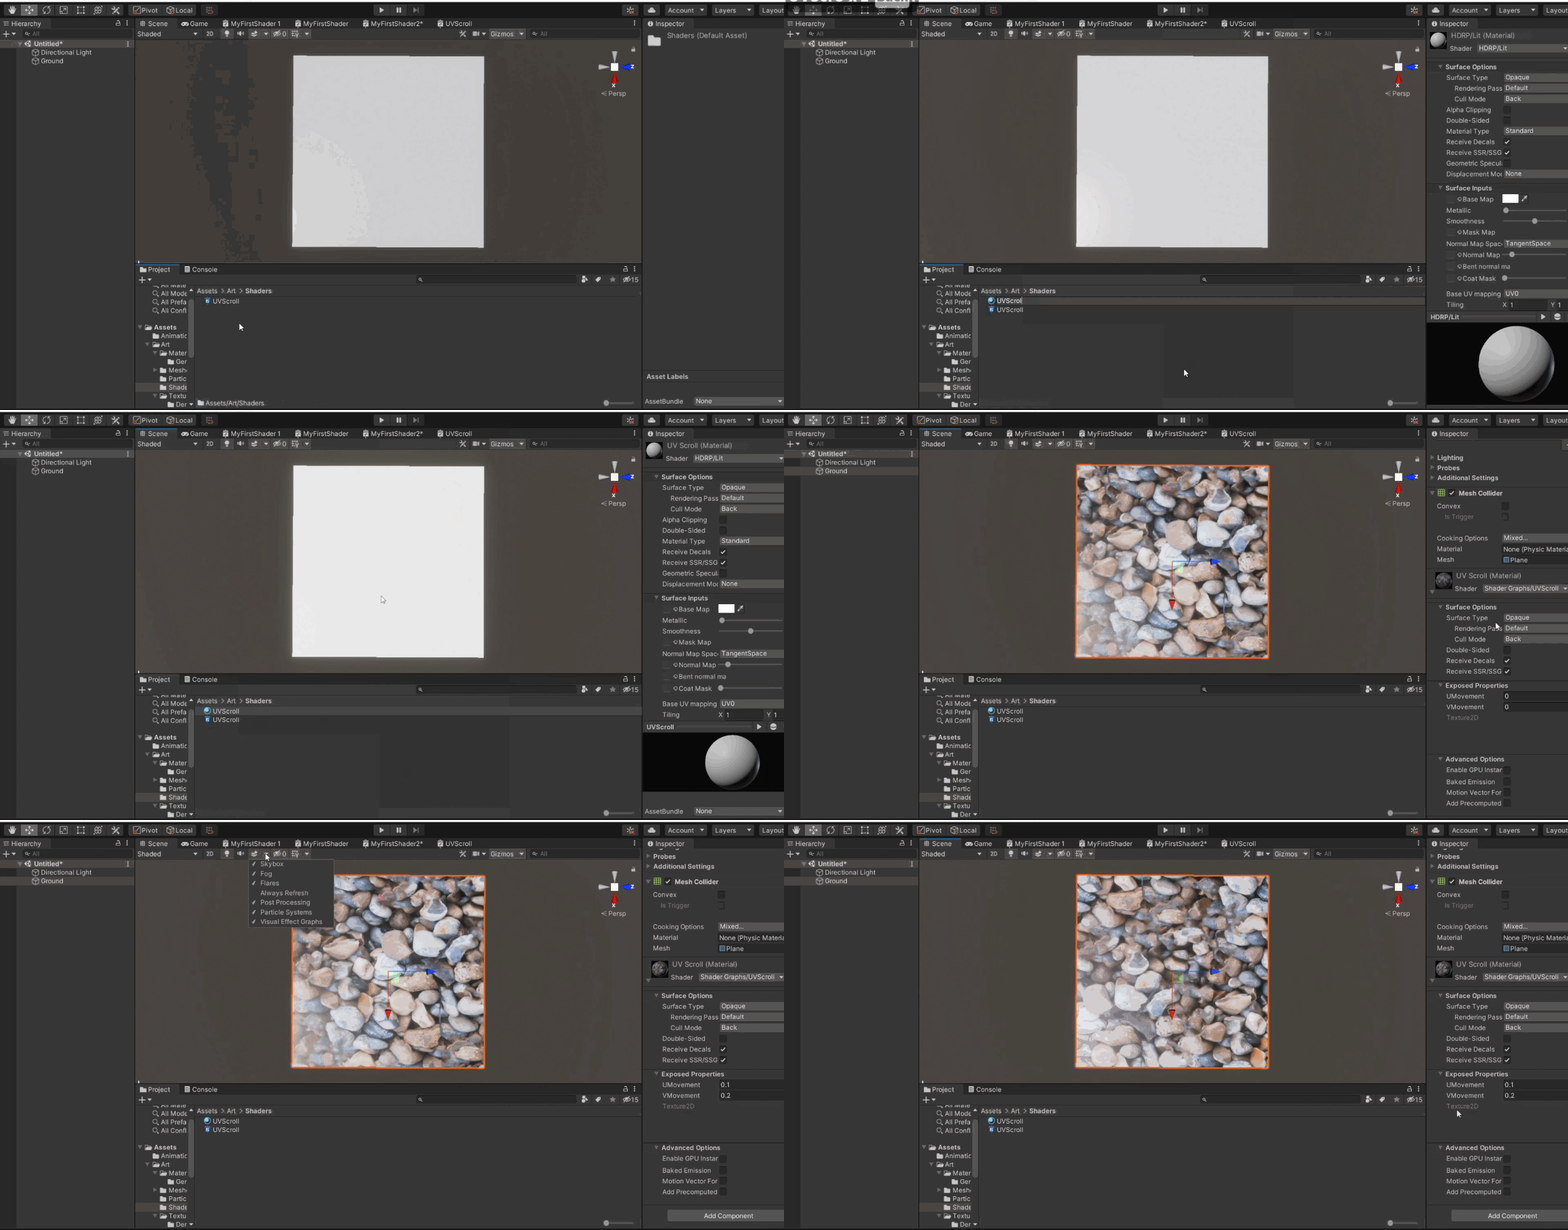
Updating these float property values will scroll the UVs of the texture. Larger the value faster the UVs will scroll. If your texture is repeatable the movement will look seamless.
NOTE: If the texture doesn’t move, go to Scene’s toggle tab located in the top bar of the scene editor. Turn on “Always refresh”. Or just press Play in Unity to see the textures update.
