Summary: This article covers a shader made in Unreal to scroll UVs of a texture overtime.
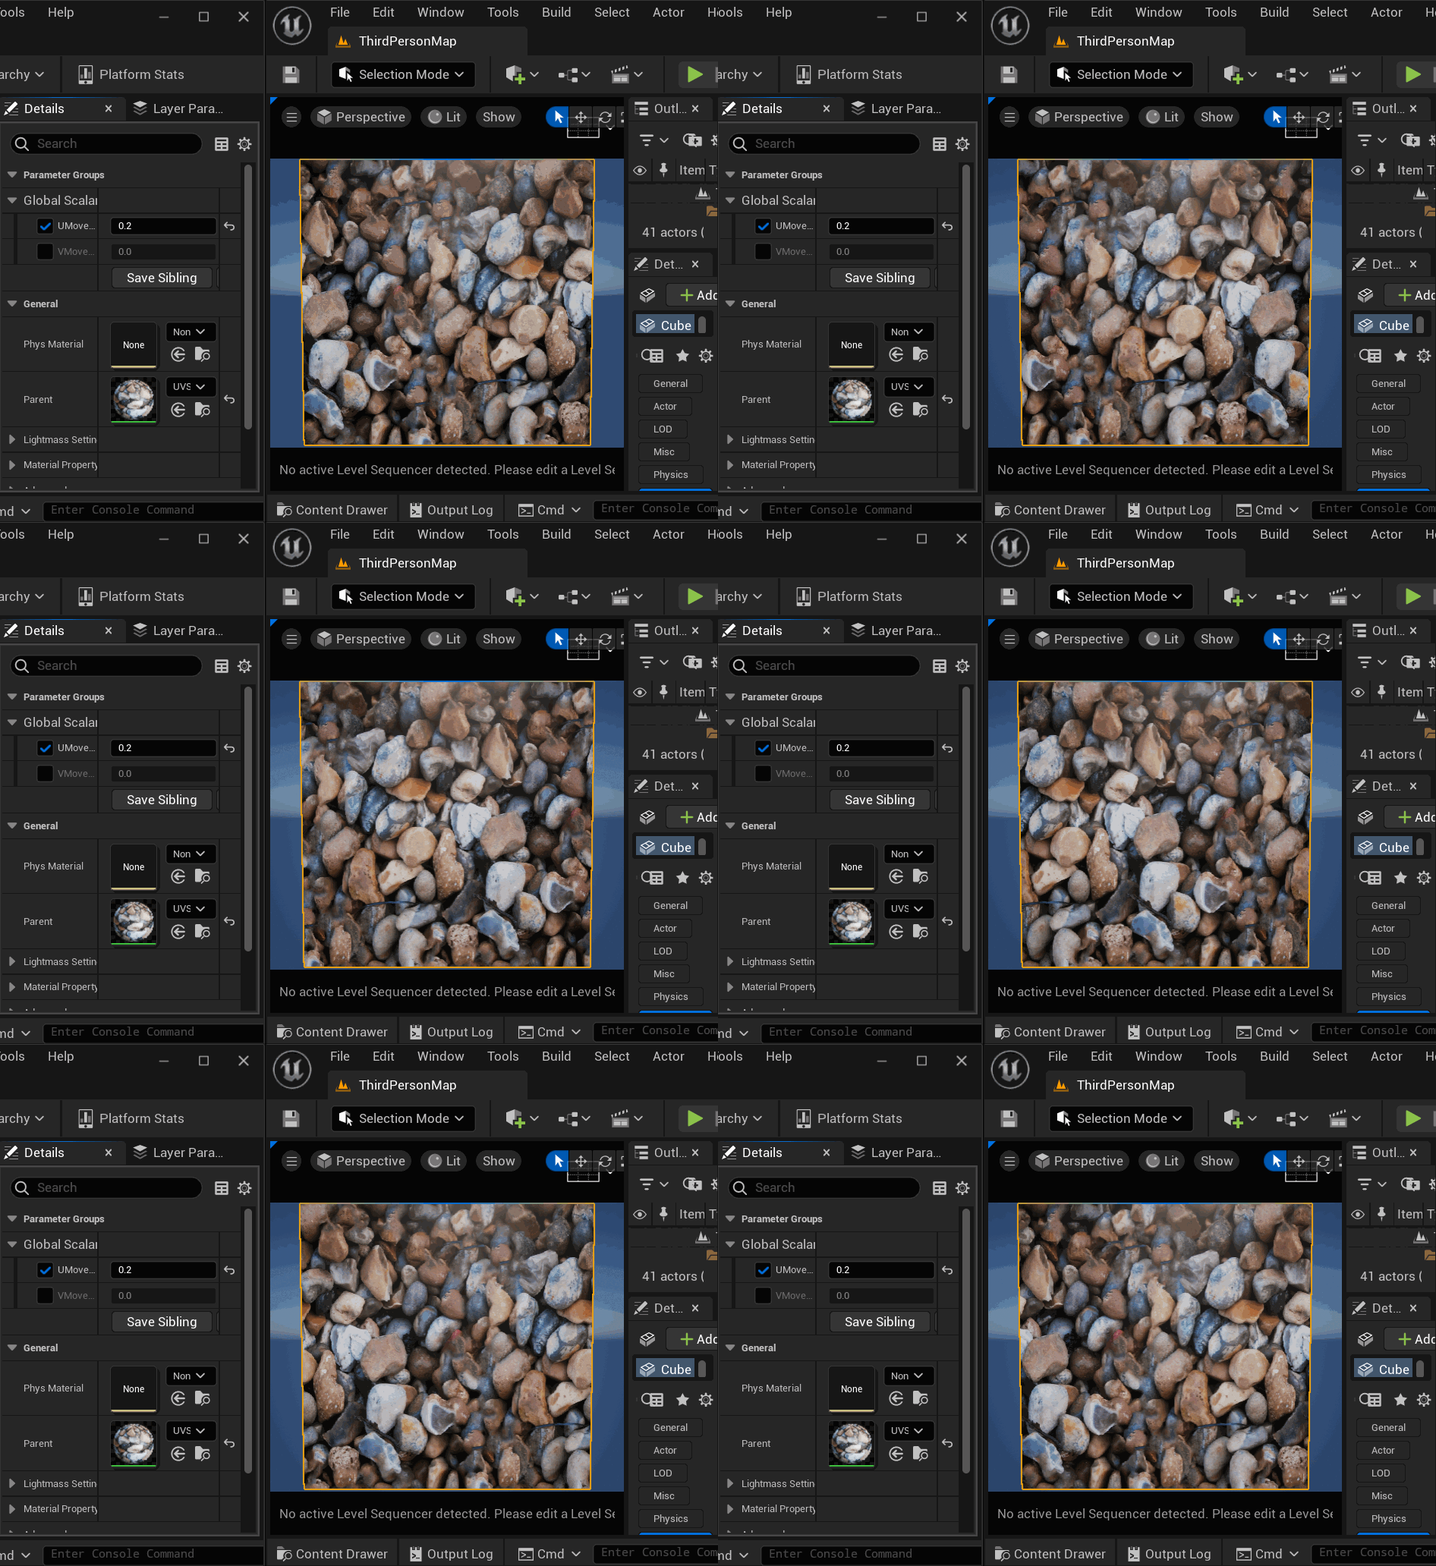
We will move the UV coordinates of a texture on a model to scroll the UVs. This shader is made using Unreal’s Shader editor.
Usually when scrolling UVs, we don’t want to see a break when the UVs reach the end of the texture and restart. So the texture needs to be tileable. To make sure the texture can repeat properly.
Follow this previous article to make your texture repeatable or tileable.
Once you have a tileable texture. Follow these steps for Unreal to make the UVs scroll.
1. Make a new material and add a texture to it.
Start Unreal. Make an empty project. We’ll make a new material for our texture.
Follow these steps:
1.1. Make a new material in Unreal. Open up the Content Browser. Go to where you want to make the material. Right click and Make new Material.
1.2. Open up the material editor by double clicking the material. Right click on an empty space and search for Texture Sample.
1.3. Select Texture sample. Under the details Tab look for Texture input dropdown. Select your desired repeatable texture to add it as the default texture of the Texture Sample node.
1.4. Now connect the Texture Sample to the Base Color of your Shader output node.
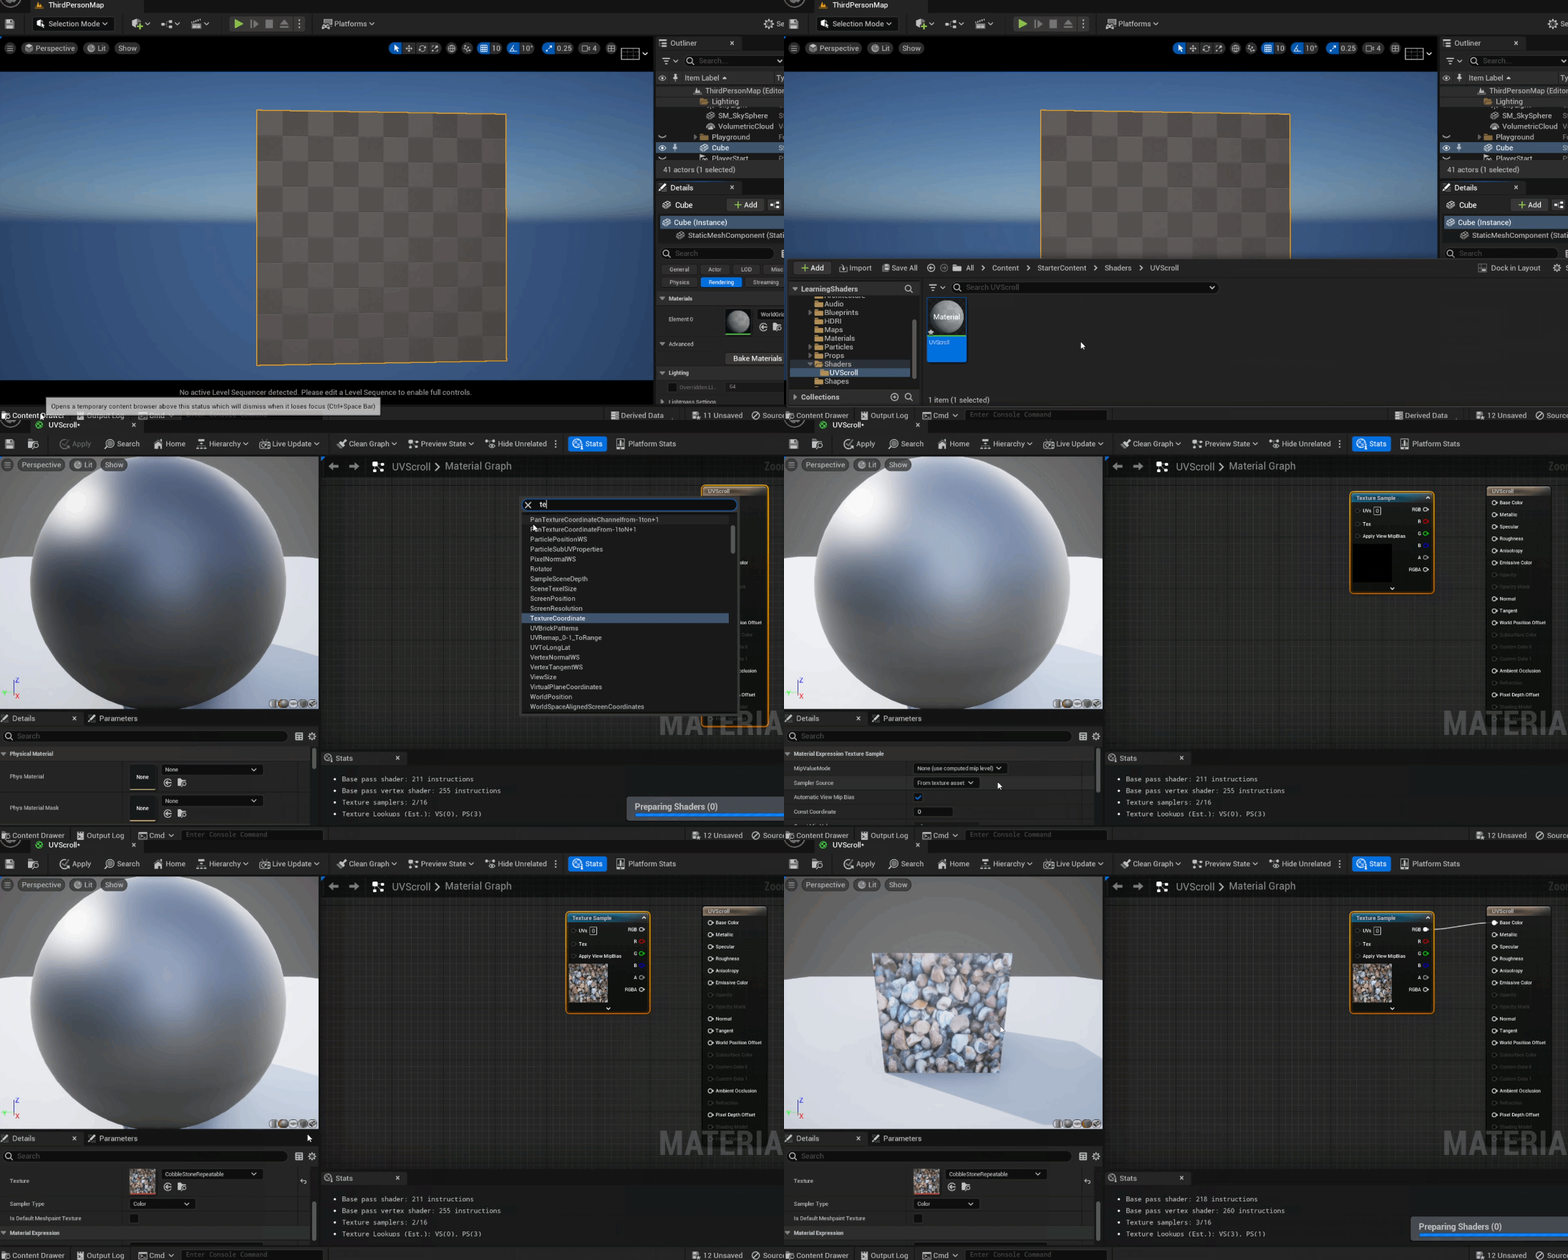
The Texture has been added to you material.
2. Add U and V modifiers.
We will connect 2 user driven constants to modify the U and V coordinates of the texture.
Follow these steps:
2.1. Make a Texture Coordinate node to manipulate the UVs of the texture.
2.2. Make two constants to change values of the Texture Coordinate node.
2.3. Turn these constants into properties so as to manipulate them in the material’s settings. Rename these constants to what they do.
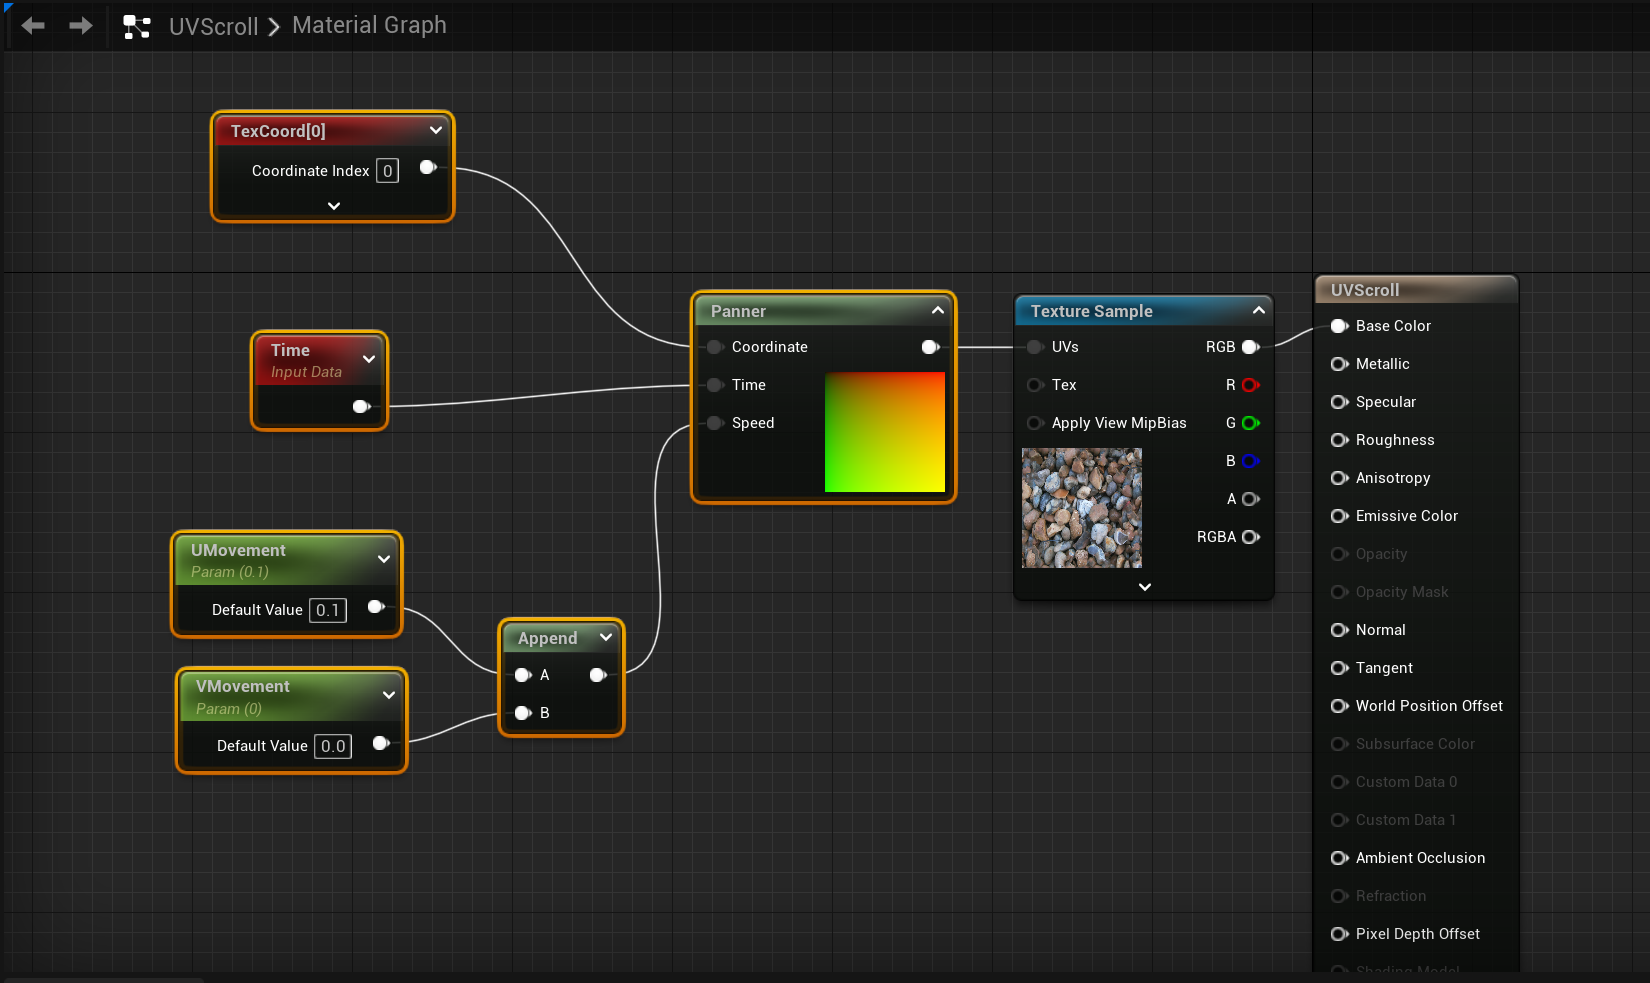
2.4. Using an Append Vector 2 node, append the constants together so as to output both values via one node. Vector 2 will maintain individual values from each constant.
2.5. Now using Add Node, add the Append node and Texture Coordinate nodes together.
2.6. Place the value from the Add Node into the UVs slot of the Texture Sample.
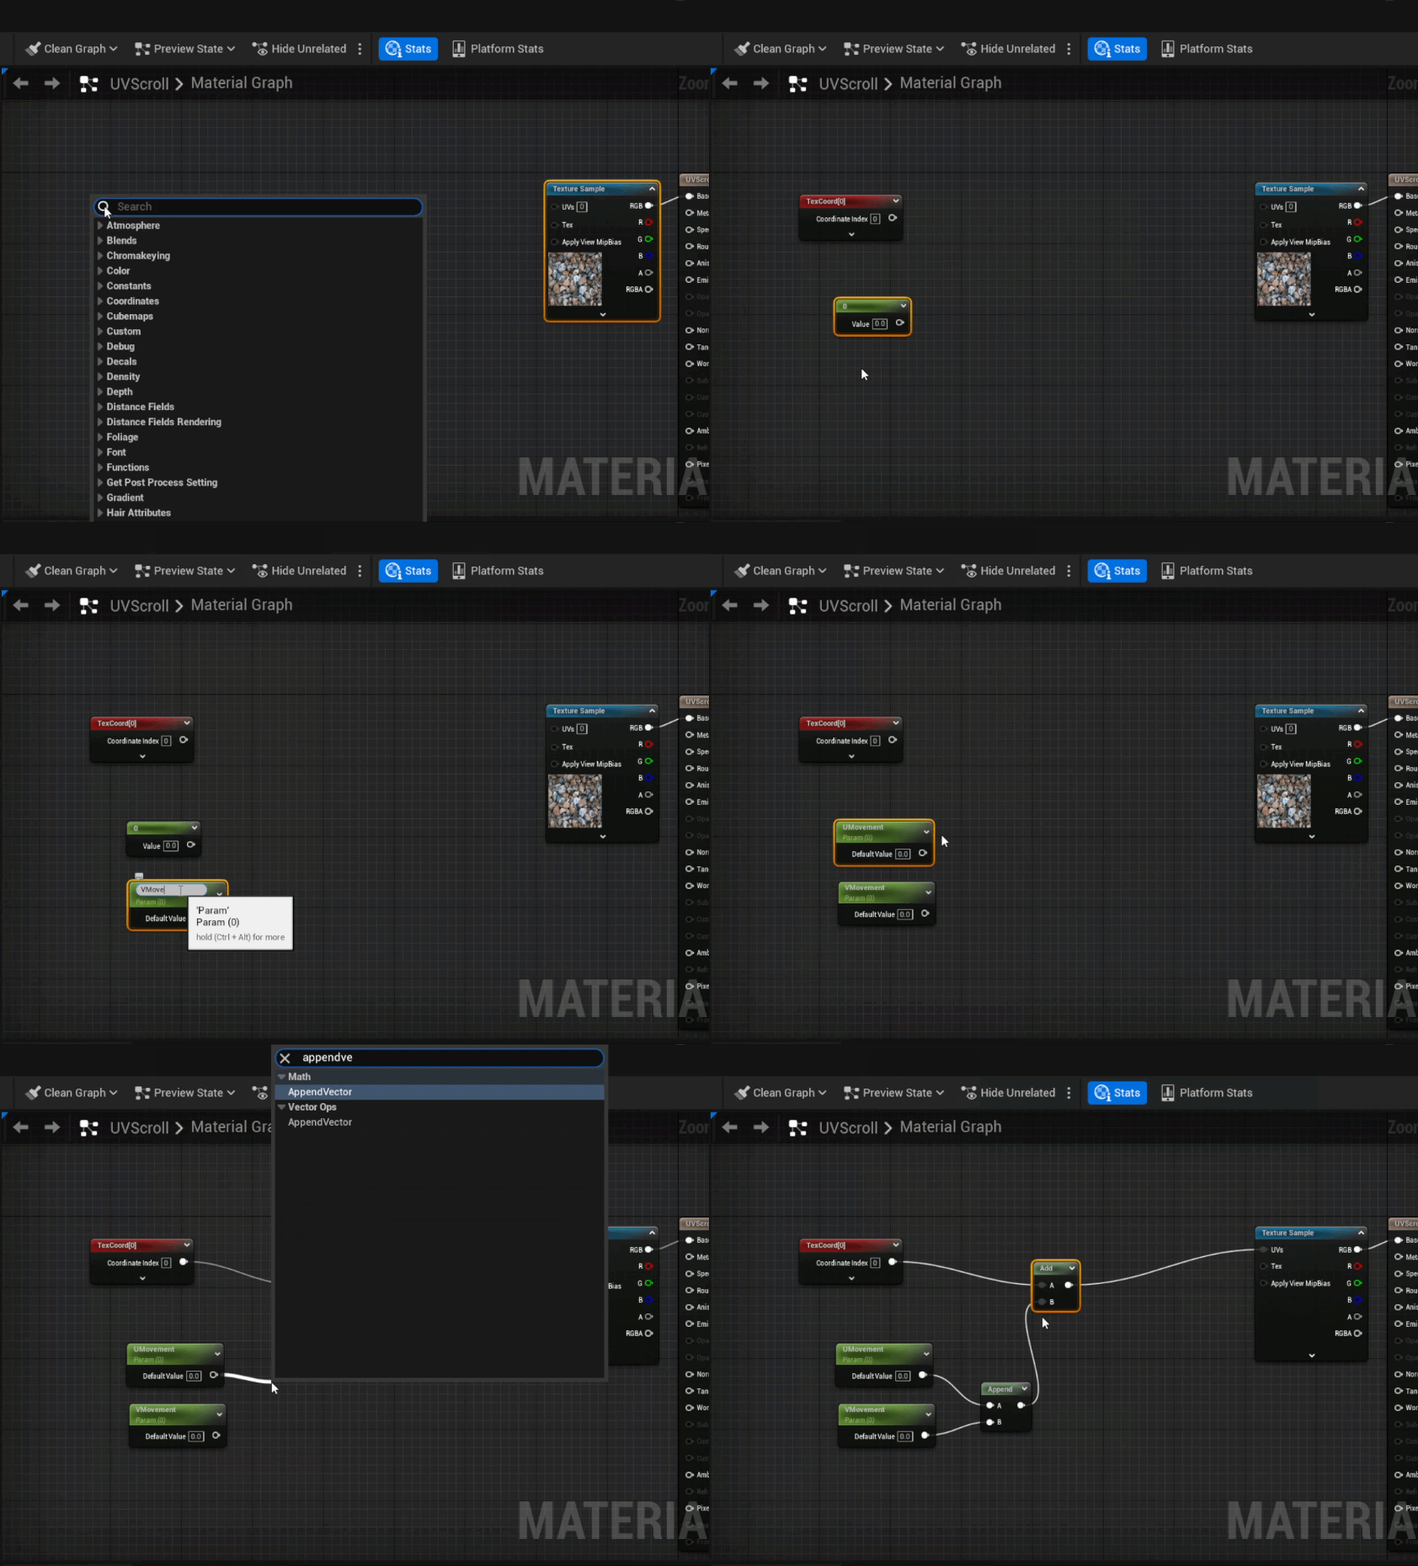
Now the Texture’s UVs can be manipulated by changing the two constants. Try changing both of the Constant Property Node’s values and see how the texture updates.
3. Update U and V modifiers over time.
Now, we’ll use a Time node to update the U and V modifiers. Thereby updating the UVs of the textures over time.
Follow these steps:
3.1. Right click on an empty space and search for Time node.
3.2. Using a multiply node, multiply the Time Node with the Append Node.
3.3. Now connect the output of the Multiply node to the Add node. Note: This will remove the Append node’s connection with the Add Note made during 2.5.
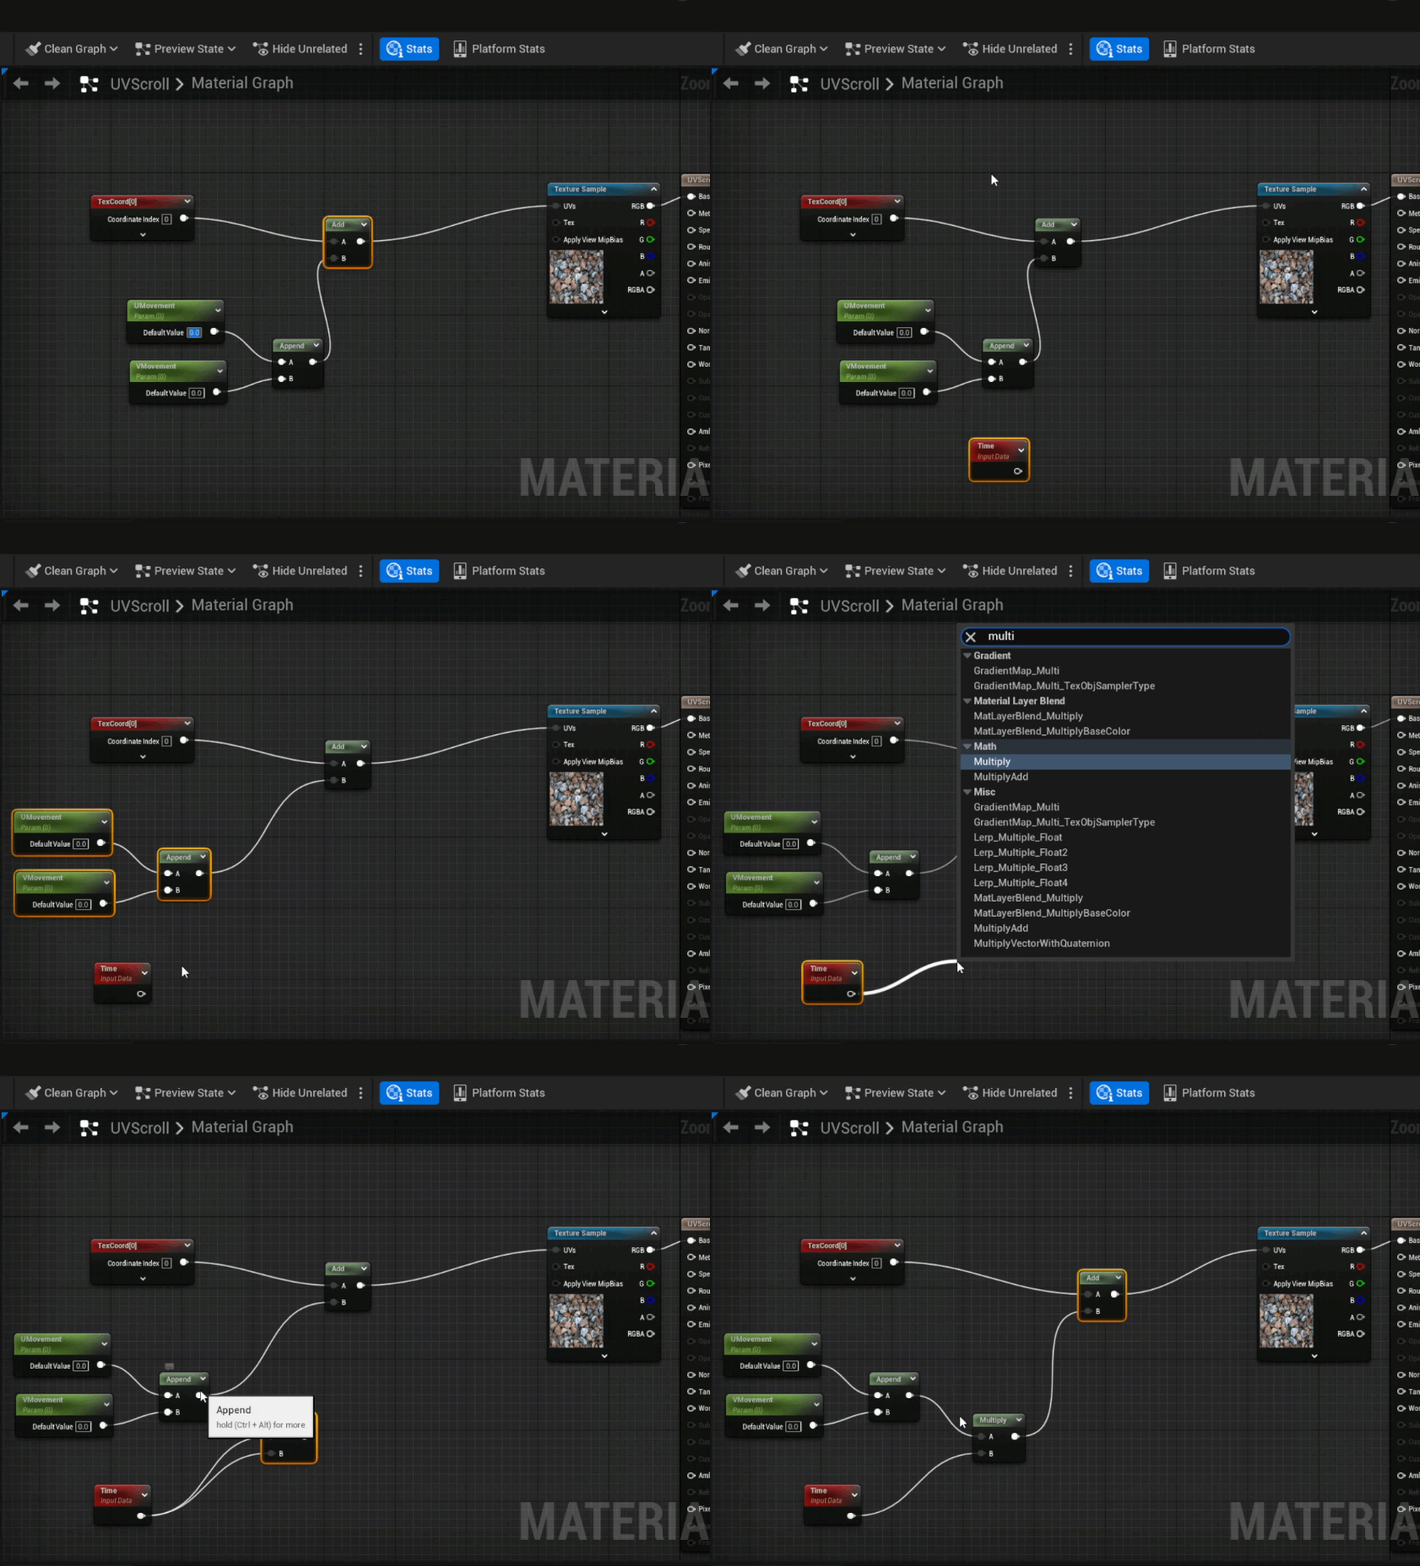
Time will now update the values of the UV coordinates. Thereby the texture over time. Try to add different values to the 2 constants and see the texture coordinates move. Since we multiplied the values, making the constants a larger value will speed up the amount the UV movement you get over time.
4. Make a Material Instance to use the new Material.
To use the material on an object in Unreal we need to make the material an Instance.
Follow these steps:
4.1. Test out the constant values and make sure they are functional. Changing the values updates the texture coordinates over time.
4.2. Now save and close the material.
4.3. Go to the Content drawer and find your material. Right click and select Create Material Instance.
4.4. Click and drag attach the instanced material to any object in Unreal.
4.5. Double click the material instance to open it up. In the Details Tab, under Global Parameters you’ll find your U and V properties you made in 2.3. And update them as you like.
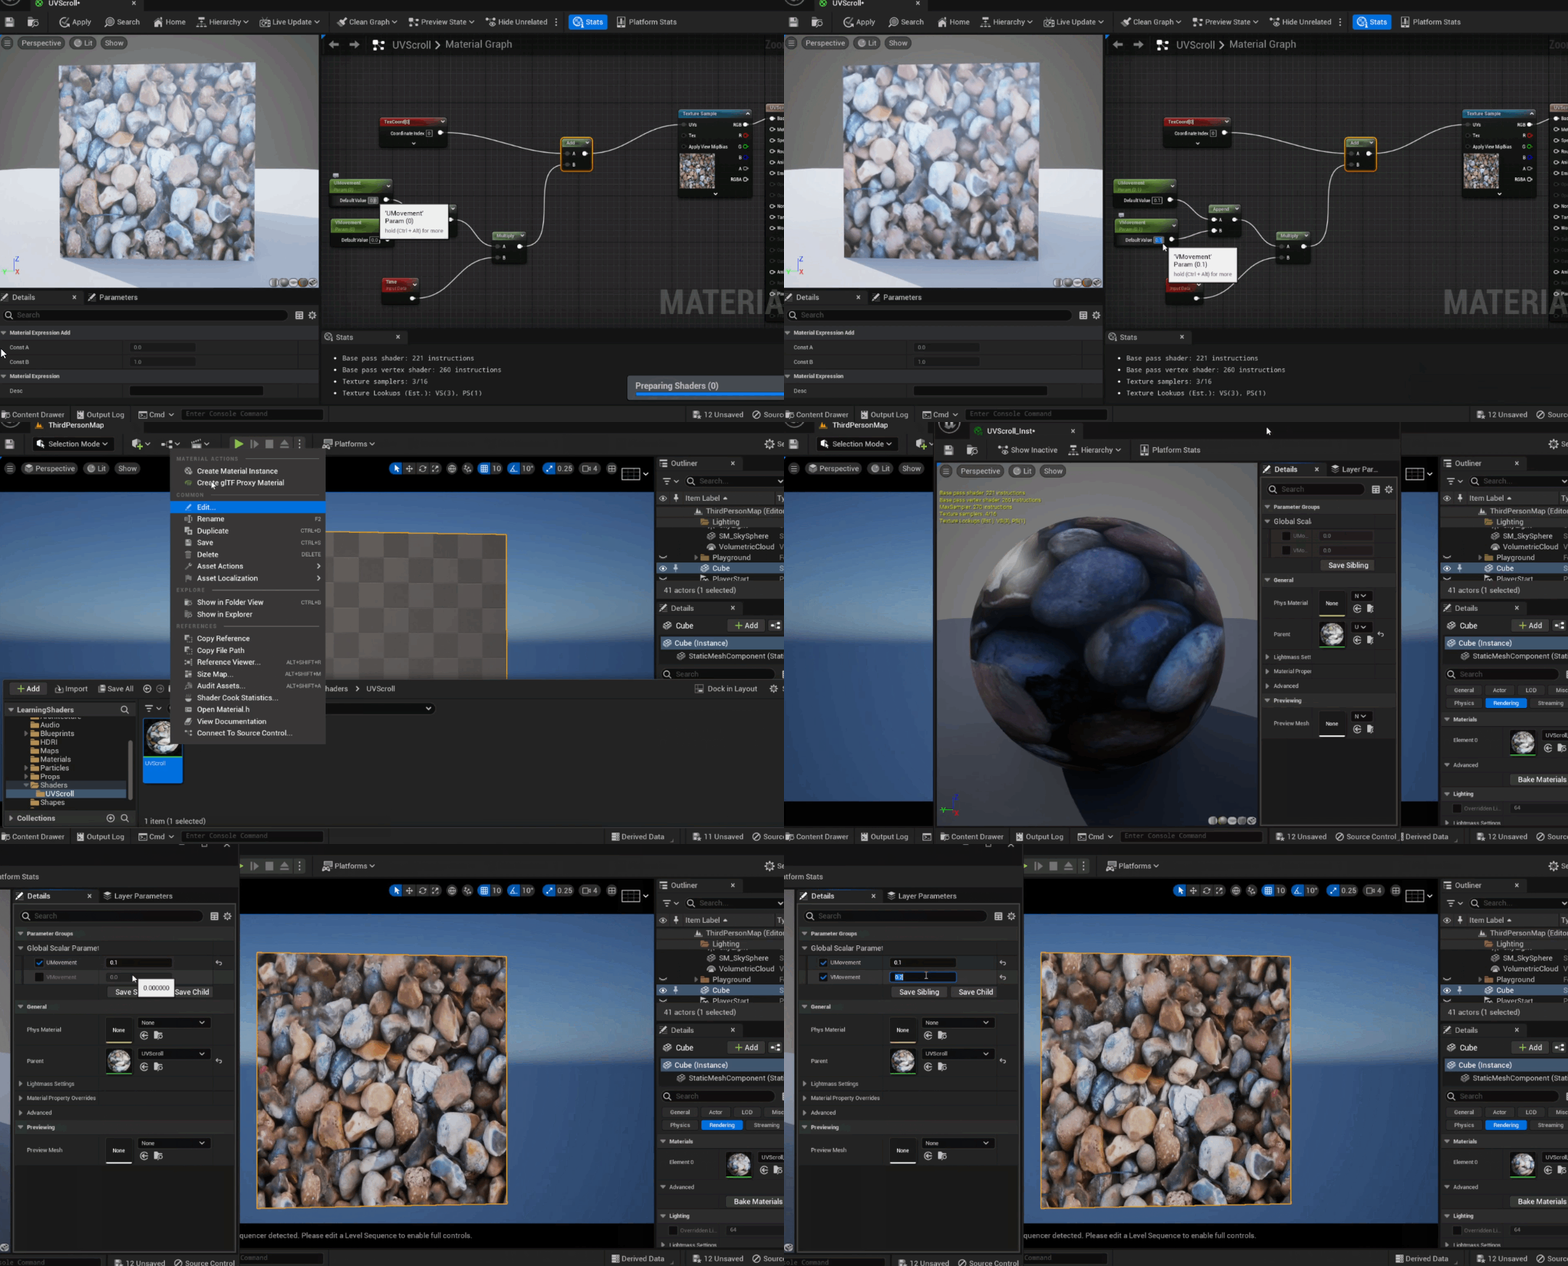
Updating these values will scroll the UVs of the texture. Larger the value faster the UVs will scroll. If your texture is repeatable the movement will look seamless.
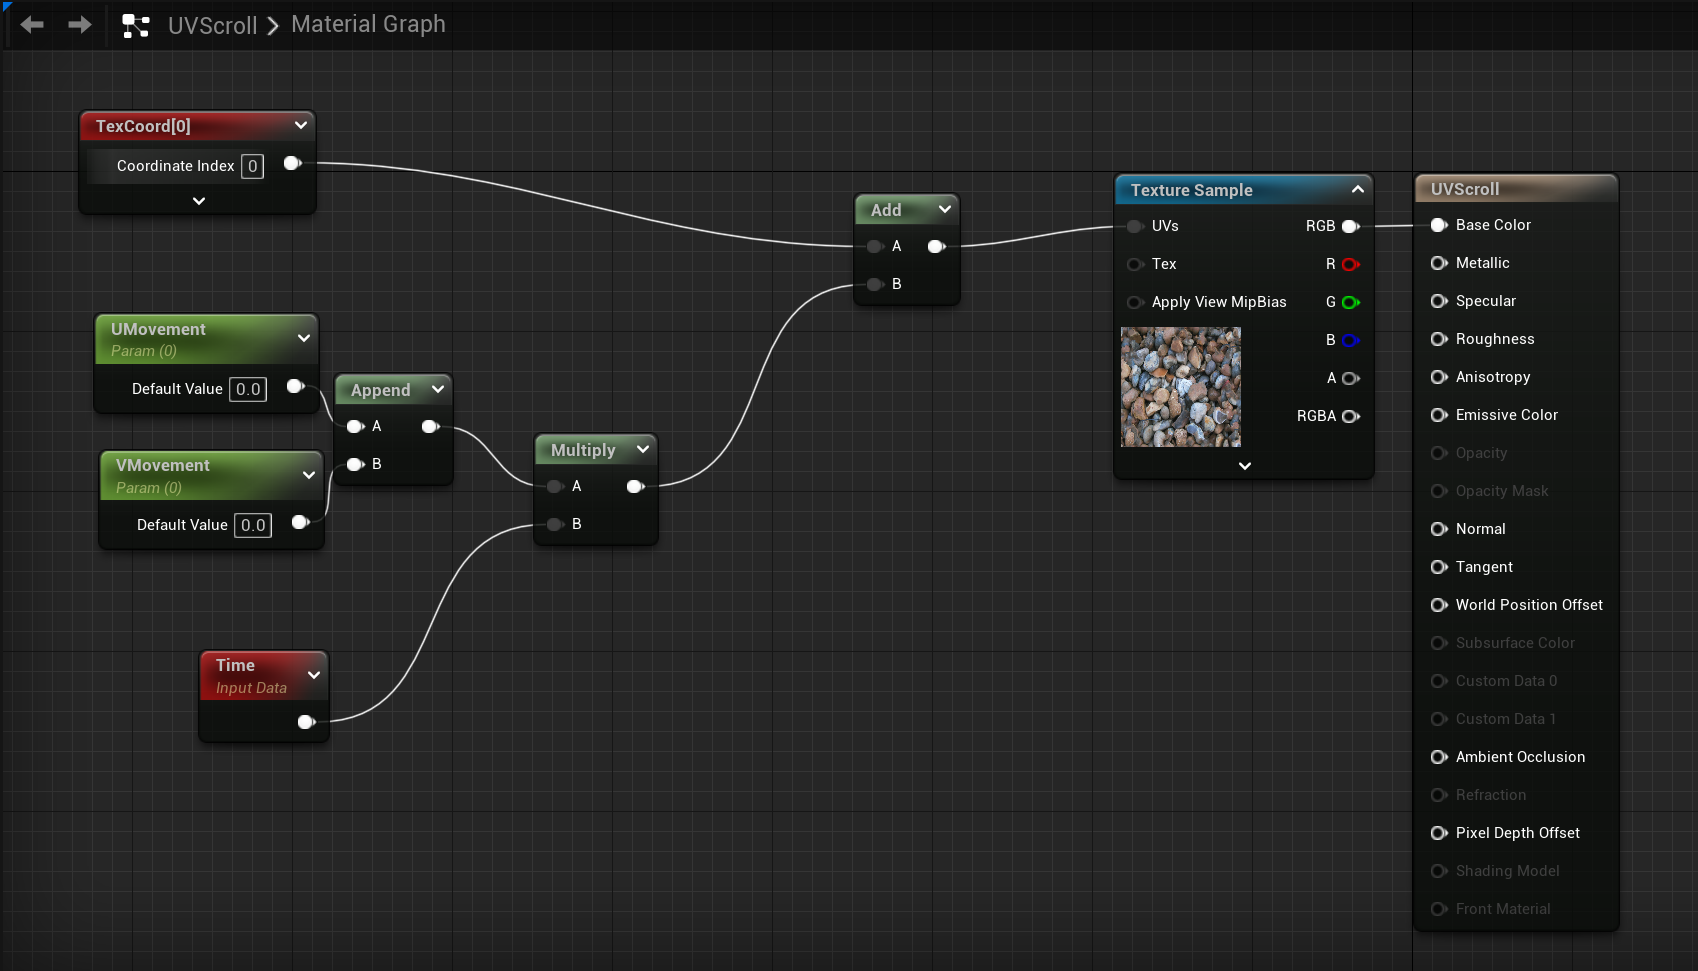
Unreal has an in-built node for this process called the Panner Node.
